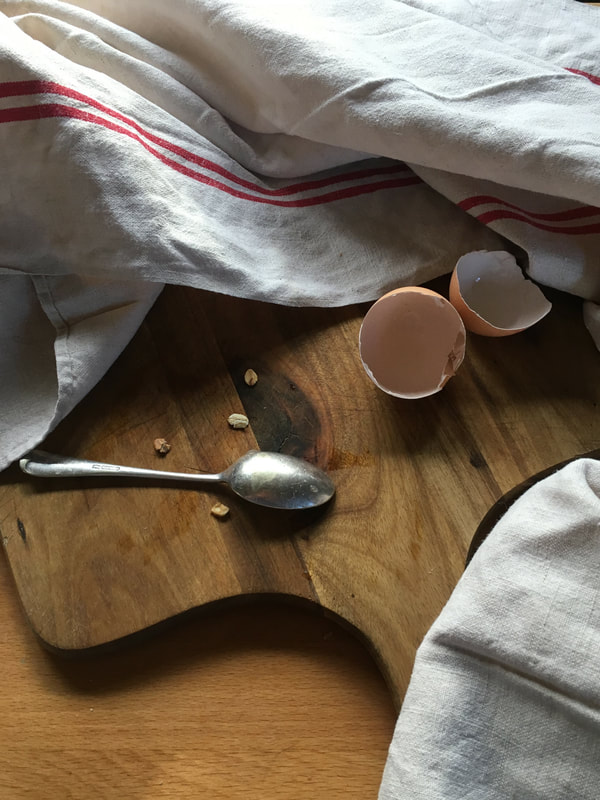
So you've made your starter, and you're rightly proud of this bubbling, fermenting pot of life that you've grown and nurtured. Here is our basic country sourdough recipe. This uses a kneading method. Some days, it just helps to bash out your frustrations on an inanimate lump of dough! Remember, this is sloooooowwww dough. All good things are worth the wait!
Country White Sourdough (makes 1 medium loaf) Plan ahead. Sourdough will always be at least 2 days in the making. Feed your starter about 8 hours (overnight is perfect) before you are ready to make your sourdough, so that it is lively and active before you begin. 300g strong white flour 80g wholemeal flour 120g active starter (liquid, 100% hydration) 250g water 8g fine sea salt Measure your dry ingredients into a large bowl. Place your starter and water in a separate bowl and mix roughly together. Now pour these into the dry ingredients. Mix with your scraper until all the ingredients are combined and a rough dough has formed. Turn out onto your clean work surface and knead for 15-20 minutes until you have an elastic dough which doesn’t stick to your fingers or to the work surface. Alternatively, place in your mixer with the dough hook attachment and mix on medium for about 7 minutes until the dough comes cleanly away from the sides of the bowl. Form the dough into a ball and place back into your lightly floured bowl. Cover with a large plastic bag or a baking cloth and leave to prove. After 30 minutes, fold and stretch your dough: using your scraper, turn the dough carefully out onto a lightly floured surface – with the ‘top’ of the dough now underneath. Taking the 4 points of the compass in turn, pull the dough gently to one side then bring over to the middle point of your dough (as if you were making a paper windmill). When all 4 ‘corners’ have been brought into the middle, turn your dough back over and place back in the bowl, so that the top of the dough remains uppermost. Repeat folding action every half an hour. This is the ‘bulk proof’ stage and should take 3 or more hours. Stretch and fold your dough about 6 times during this stage. Each time you will be building the strength of your dough and improving the final loaf. After 3-4 hours (depending upon ambient temperature) you are ready to shape your dough. Don’t expect it to have doubled in size like a yeasted dough. It will not need de-gassing. Using the round side of your scraper, carefully tip out the dough onto a lightly floured surface, so that the ‘top’ of the dough is now lying underneath on your floured countertop. Shape your loaf by stretching the edge of the dough and bringing onto the middle, like when stretching and folding your dough during the first prove. Go around the entire circle of dough, then flip and place it seem side down on your counter, ensuring there is no flour underneath the seam. Now you can ‘tighten’ your ball by dragging it towards you and allowing the friction of the counter to resist the movement. This should cause the ‘skin’ of your ball of dough to tighten a little. Adjust and do the same in a few different directions around your ball. Do not over-tighten. A few little stretches are all it takes. You don’t want to tear the skin that is containing your dough under tension. When you have a tight ball, place seam side up into a pre-floured proving basket – wholemeal flour works best here, as the bran prevents sticking (do not use rye flour). However, a well-shaped loaf will not stick in your banneton. It is essential that you pay attention to the tightening of the dough at this stage. If your loaf collapses when you tip it out, ready to bake, it could well be you have not tightened sufficiently before placing in the basket. If you have no proving basket, flour a good quality linen cloth well, placed inside a round 1litre bowl (eg Pyrex bowl). This prevents your dough relaxing into a puddle whilst it proves for a second time. Cover with a loose-fitting plastic bag or baking cloth for about 3-5 hours (depending upon ambient temperature) until the dough appears ready. At this stage, the dough will bounce slowly back when pressed gently with a floured finger. If it bounces rapidly back, it needs a little longer. If the indentation remains, you have over-proved your dough. Alternatively, you can place the dough in the fridge when it appears to be nearly ready, say after 3-4 hours, and leave overnight. When the loaves are ready to bake, turn them out onto a lightly dusted peel. Be gentle with your loaves at this stage. Slash the loaves at an oblique angle of about 30 degrees, to allow extra expansion in the oven. Place in a very hot oven, pre-heated to 240°C. As you place the loaves in the oven, spray the walls, ceiling and floor of your oven with water, avoiding the loaves themselves. Now turn down your oven down to 220 °C and bake for 35-45 minutes for the larger, until golden or dark brown, according to preference. Alternatively, bake inside a pre-heated Dutch oven or cast iron casserole dish – the lid will keep in all the steam that is released by the dough during the first 15 mins, after which you can remove the lid and continue to bake and crust over. To check reliably whether your bread is baked, place a probe thermometer into the centre. A loaf will be reliably baked when the thermometer reads 95°C or more. Notes on refreshing your starters: Wheat starter: Wheat starters can be kept in a liquid state (usually 100% hydration) or a stiff state (usually 50% hydration). This recipe uses a liquid starter. To refresh your liquid starter, take 100g of starter (discarding or using the rest) and add 100g water and 100g of flour, ie equal parts flour and water. If using a new recipe, always check whether a stiff or liquid starter is required and adjust your overall water/flour quantities in the recipe, if necessary. Leave the refreshed starter at a warm room temperature for 8-12 hours before using. If it is not required straight away, simply place in the fridge after a few hours. Your starter will keep refrigerated for a couple of weeks (and can even be dehydrated or frozen!), but it is best to refresh it every 7 days even if not being used. 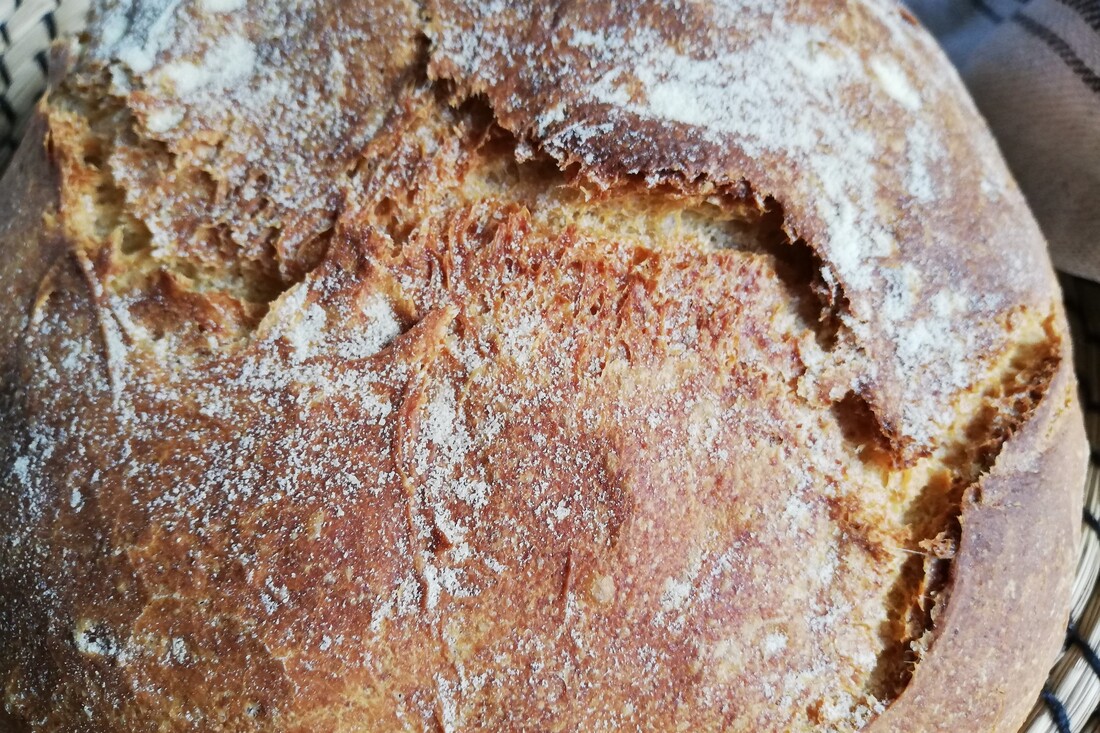 Pane Pugliese
(makes 1 large loaf) Although many of my recipes are inspired by the Tuscany region, this recipe is a Southern Italian treasure from the Puglia region. Pane Pugliese is made with either all or the greater part hard durum wheat – fine semolina or ‘semola rimacinata di grano duro’. The finest example of this is Pane di Altamura, now granted PDO (Protected Designation of Origin) status. The loaf is a beautiful pale gold in colour and has the characteristic crumb and crunchy crust of a semolina bread. It is utterly delicious and well worth a try. If you wish, you can use all semolina for this recipe. Simply replace the bread flour in the biga and dough with more semolina. Ingredients Overnight biga: Strong bread flour 100g Tepid water 100g Fresh yeast 2g For the dough: Strong bread flour 100g Fine durum semolina 400g Tepid water 300g Biga, from above 200g Fresh Yeast 10g (or 5g instant dried yeast)* Sea salt 10g *if you intend to prove overnight in the fridge, reduce the amount of yeast to about half. Method The night before, mix together the ingredients for the biga and leave, covered, overnight at ambient room temperature. Make the dough by combining the above ingredients and knead for 10-15 minutes until you have a smooth elastic dough. Leave, covered, in an oiled bowl for 30 mins, after which you can stretch and fold your dough. Cover once more and leave for a further 30 minutes. When your dough has significantly increased in size, after this first prove of about 1 hour, tip it out onto a lightly floured surface and shape tightly into a ball. Place into a floured banneton, cover and leave to prove again for 1 – 1½ hours, depending on ambient temperature. Alternatively, place in the fridge and allow to prove slowly overnight*. Pre-heat the oven to 240°C. When your loaf is ready, slash the top with a sharp knife or baker’s lame and either slide from a peel onto a hot baking stone, or bake inside a preheated cast iron pot. Turn oven down to 220°C and bake for 45-50 minutes. If baking in a cast iron pot, remove the lid after 15 minutes to allow the loaf to develop a golden crust. The loaf will be baked when the crumb reaches 95°C. Leave to cool on a cooling rack.  Rhubarb is seasonal and abundant. Here we've coupled it with the last of the Spanish blood oranges, but any orange will do!
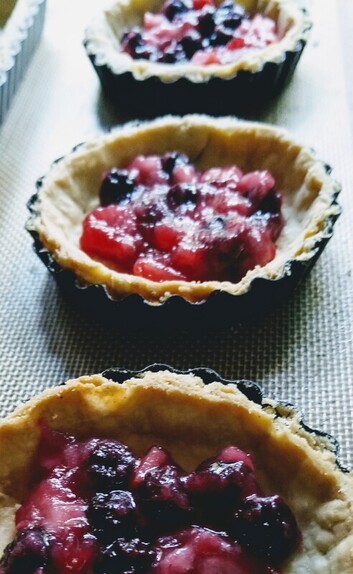
Ingredients: For the sweetcrust 75g icing sugar 125g butter 1 medium egg 250g plain flour For the filling 4-5 sticks of rhubarb 250g sugar 250g water 1 orange (or blood orange) For the frangipane 150g caster sugar 150g butter 3 medium eggs 150g ground almonds 30g plain flour Method: This recipe involves making 3 elements - the sweetcrust, the filling and the frangipane - separately, and assembling together at the end. For the sweetcrust:
For the filling:
For the frangipane:
Now you're ready to assemble!
 Quick and easy pitta breads (makes 12)
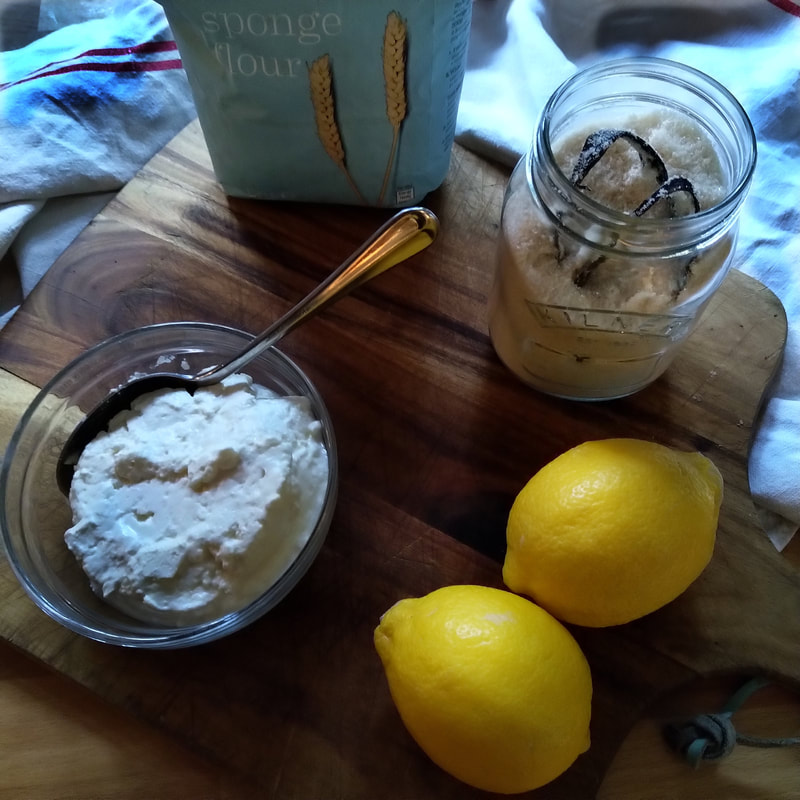
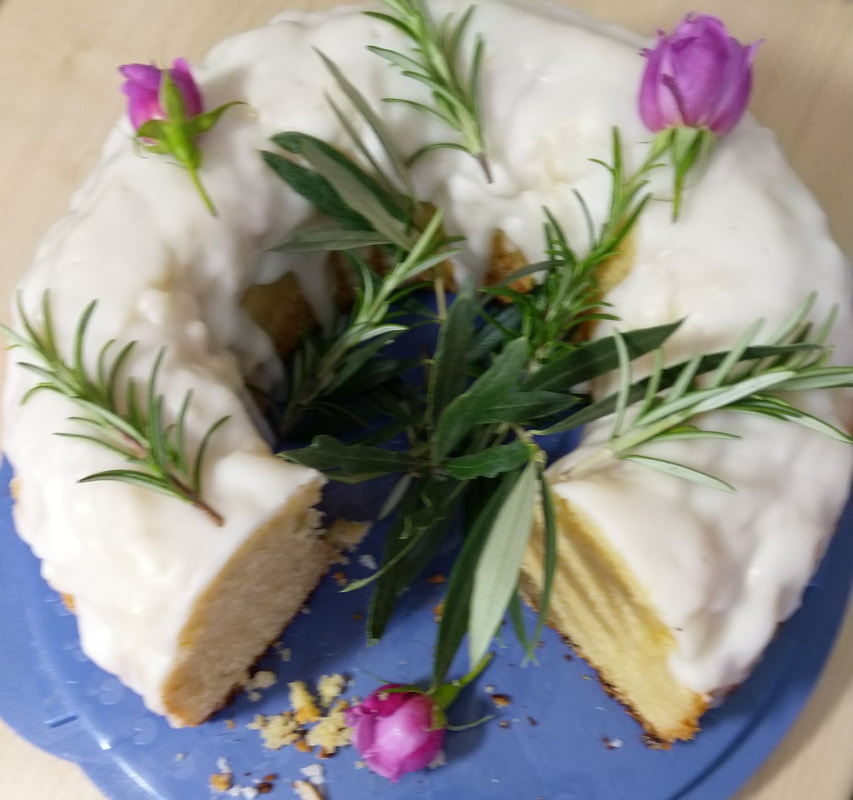
For the dough: 600g Strong white bread flour* 15g fresh yeast (or 7g instant dried) 2 tbsp olive oil 300g tepid water 10g fine sea salt *or substitute plain flour, if you don’t have bread flour. Method Place the dry ingredients in your bowl, ensuring the salt is on one side, the yeast on the other. If you don’t have ready yeast, follow the instructions on the packet for activation. Now add the water and oil and, using a dough scraper or your hands, bring the mixture together into a rough dough. Take out of the bowl and need for about 10 minutes until you have a smooth and elastic dough. Place back in a lightly dusted bowl, cover and rest for 1 hour at room temperature. Preheat your oven to 240-250°C, with a good quality baking sheet or baking stone in place to get super-hot. After about an hour or so, remove the dough and divide into quarters. Take each quarter, squash it a little, then divide into 3 pieces and form each into a small ball with a tight seam underneath. Each piece should finish up as a smooth ball, with no edges or rough bits showing. Cover once more and leave to rest for a further 15 minutes. Take the first 4 balls and roll out into ovals about 20cm long and even thickness. Place them on a lightly dusted peel, or onto a silicone sheet that can be slid straight into the oven. Slide into your oven and bake for about 5 minutes. They should puff up in the oven. Remove after 5 minutes and cover with a linen cloth whilst you cook the remaining two batches. Keep covered whilst they cool, so the pittas remain soft and pliable. If you don’t, they will dry and crisp up. When cool, they can be kept in an airtight container for several days or frozen immediately. 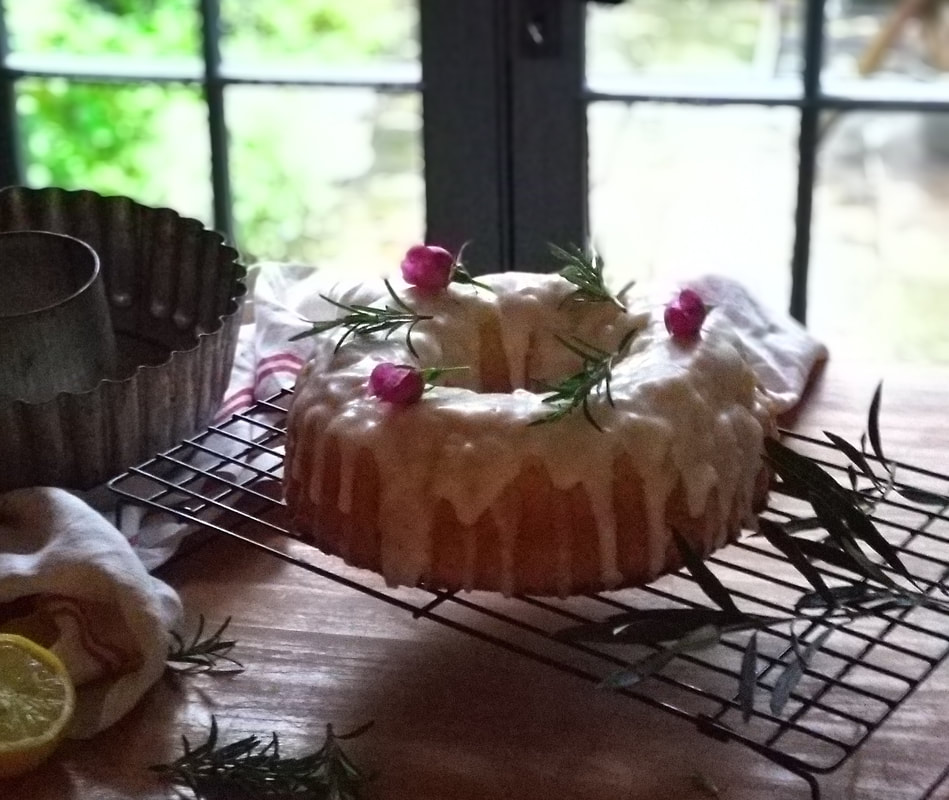 This cake was created to use the delicious curd cheese I brought back with me from Wildes Cheese after a delightful day spent learning about cheese-making. Philip and Keith run this small urban artisan dairy in Tottenham, North London. On reading about their passion for their craft I knew that this is where I wanted to learn. They say they were drawn to cheesemaking “because it’s pure magic, a form of alchemy”. Now, where have I heard that before?!! The curd cheese’s soft and velvety texture is perfect for making a rich bundt cake, especially paired with the sweet sharpness of lemon. The resulting cake is light and moist, in spite of its characteristically dense crumb. And it’s wickedly moreish!
Method Pre-heat your oven to 170°C. First prepare your bundt tin, by greasing and covering with granulated sugar. Set to one side. Zest two lemons and rub into your caster sugar. Now cream together your softened butter and caster sugar, until light and fluffy. Mix in the curd cheese and crème fraiche. Now split and scrape the seeds from your vanilla pod and stir in together with the lemon juice and ground almonds.
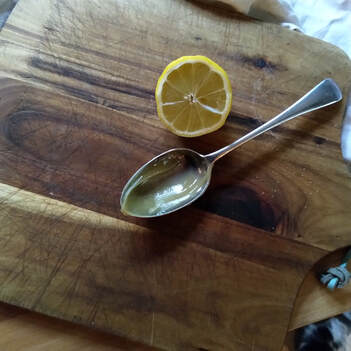
Whilst the cake is baking you can prepare the drizzle. Mix together the juice of one lemon and 50g caster sugar. When your cake is cooked, leave it for about 10 minutes in the tin then turn out onto a wire rack. Using a spoon, drizzle your lemon mix evenly over your cake and leave to cool completely.
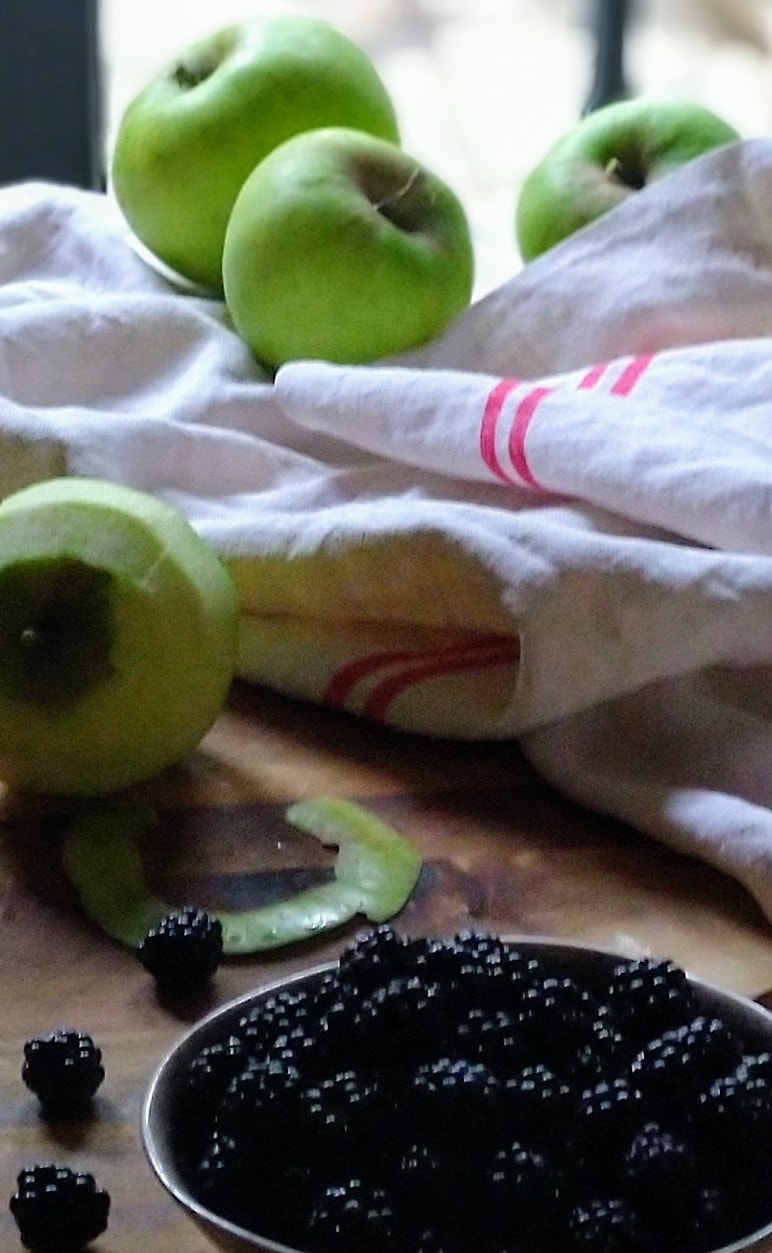
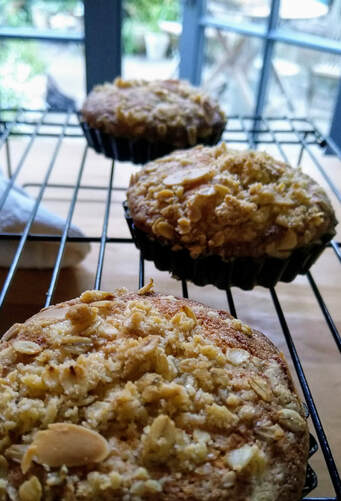
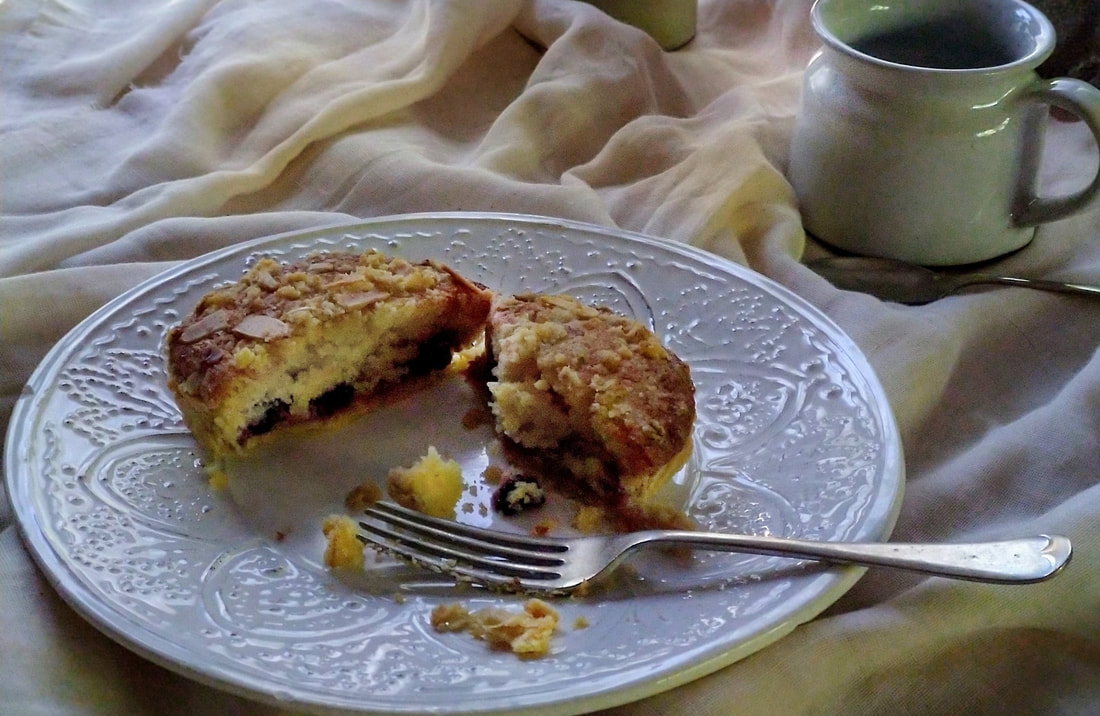 Our communal village orchard is heavy with wonderful produce right now. The plums, mulberries and greengages are over, but now the apples, pears, quince and medlars now have their chance to shine. Even the hedgerows enclosing the old orchard are bearing blackberries and nuts to gather. With my basket laden, I set about baking something to use the village bounty. The nuts are, as yet, too young and fresh to grind down to a useful flour, so I used ground almonds – but if you have your own hazelnuts, do use once they’re dried. Just grind them down to a fine meal. The young cob nuts will be fine for the crumble topping.
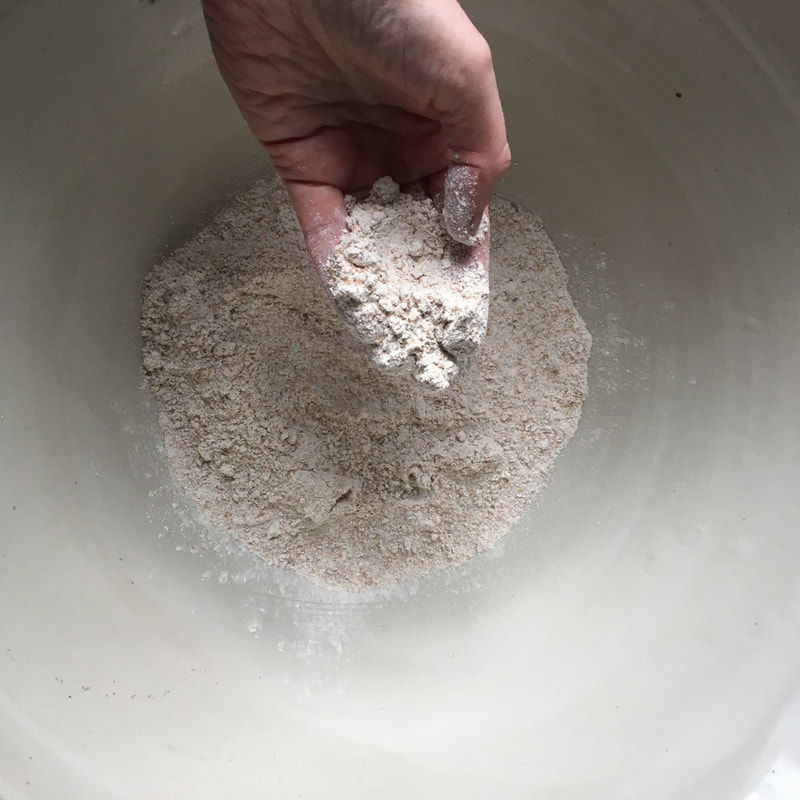
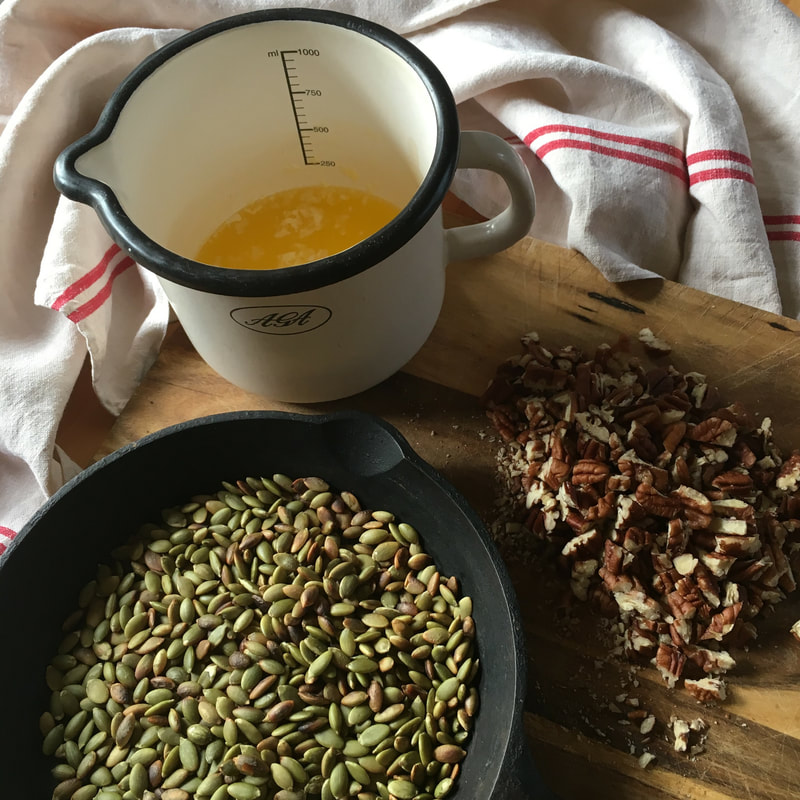
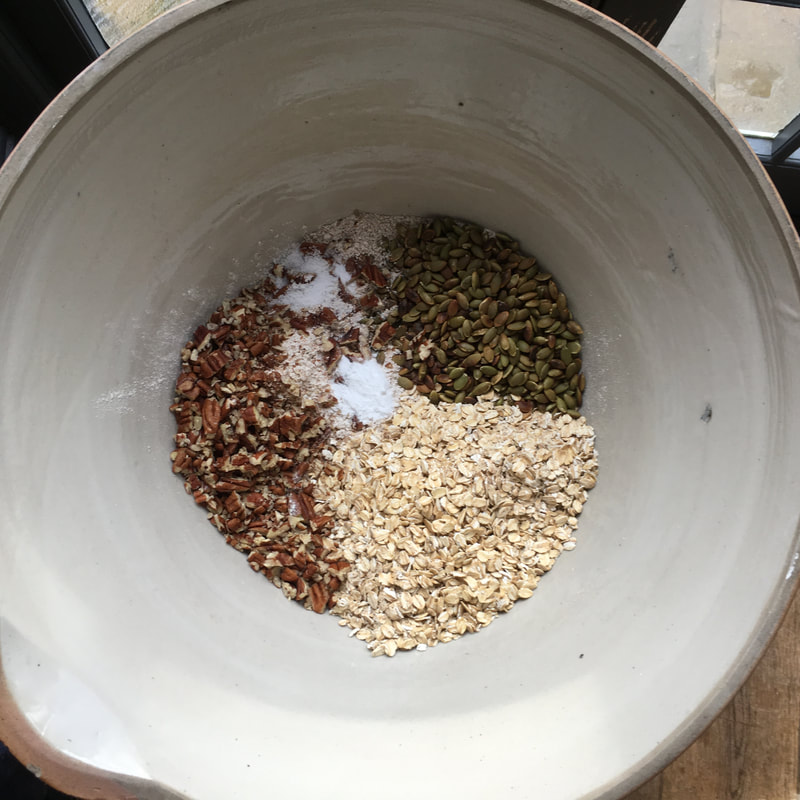
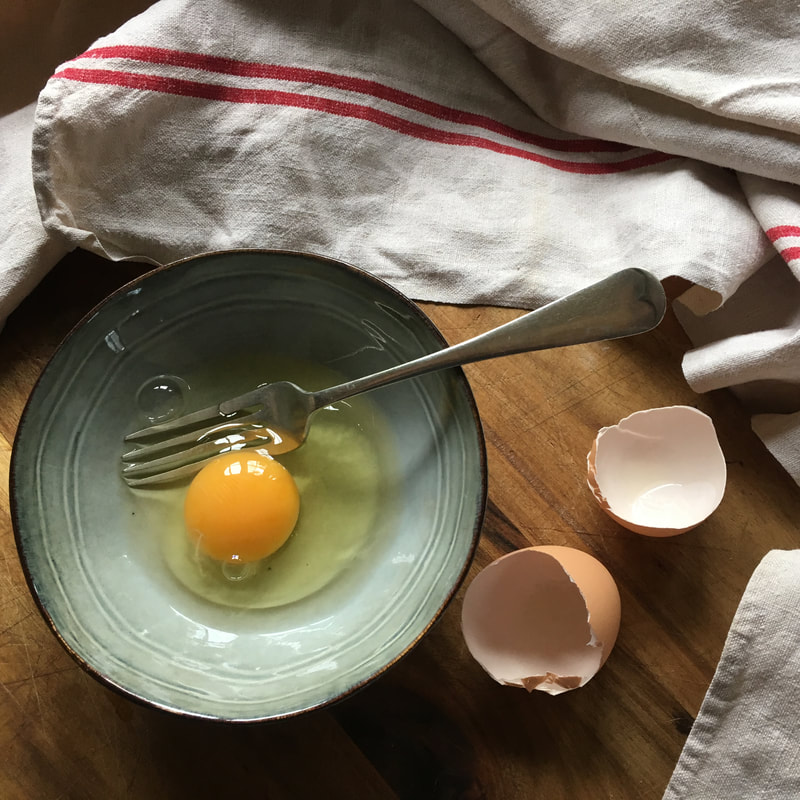
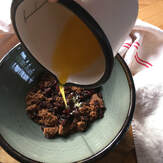
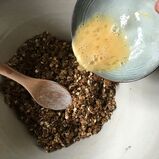
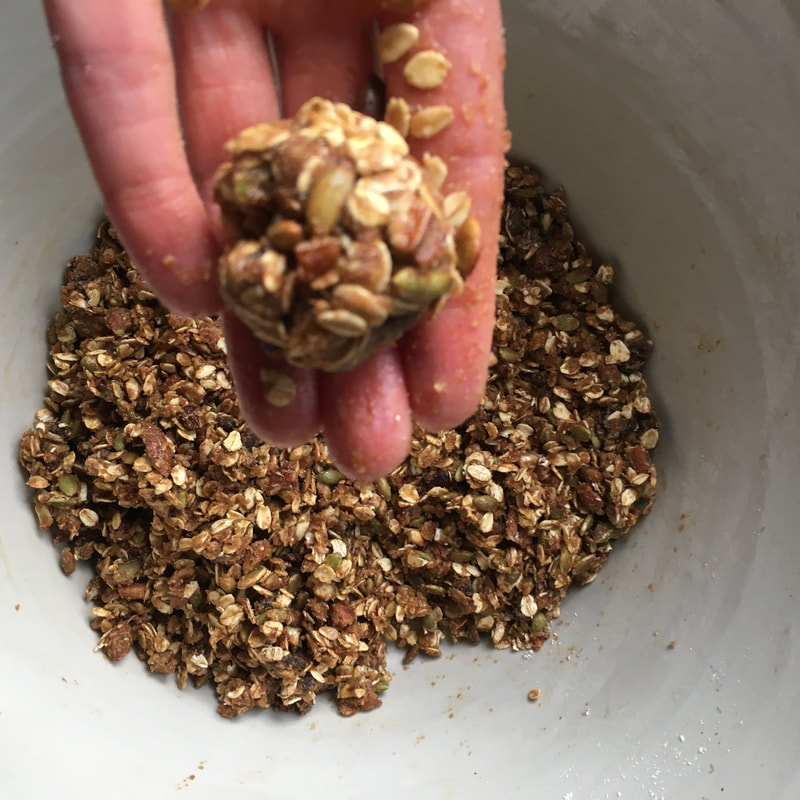
Eat with pleasure. You have spent time making a thing of beauty from things you have foraged. Take your time to savour. Enjoy.  These spelt cookies are usually available at breaktime on our workshops and we're often asked for the recipe. We're so lucky to have the most wonderful organic spelt flour grown and milled near the Baking School. I love to use it as much as possible. These cookies are so packed with goodness, they don't feel like an indulgence - just a healthy treat to keep you going when you're flagging between meals. You can use whatever dried fruit you like: raisins, cranberries, sultanas - even chopped dates or prunes. And you can choose to use all nuts, all seeds or, as I have done here, a combination of the two. Remember that seeds and nuts will be more flavourful if you toast them in a dry pan beforehand. Spelt, oat, fruit & nut cookies (makes 18-20 cookies) We make these cookies with the wonderful wholemeal spelt we buy from our local miller, at Foster’s Mill, but you can use any flavoursome stoneground spelt or other favourite wholemeal flour. They are filled with oats, dried fruit and seeds or nuts, so make a great morning snack or ‘breakfast on the go’! Ingredients: 125g wholemeal spelt (or other wholemeal flour) 100g jumbo oats 100g regular oats ½ tsp bicarbonate of soda ½ tsp salt 100g butter, melted 180g soft dark brown sugar 1 large egg, beaten 100g raisins or sultanas 50g toasted pecans (or choice of nut), chopped 50g toasted pumpkin seeds
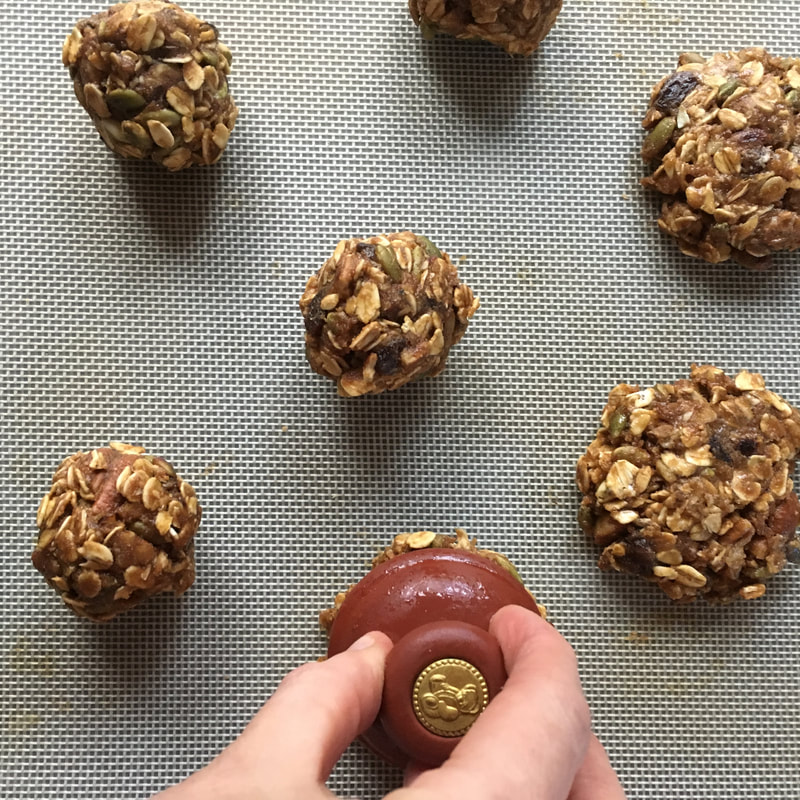
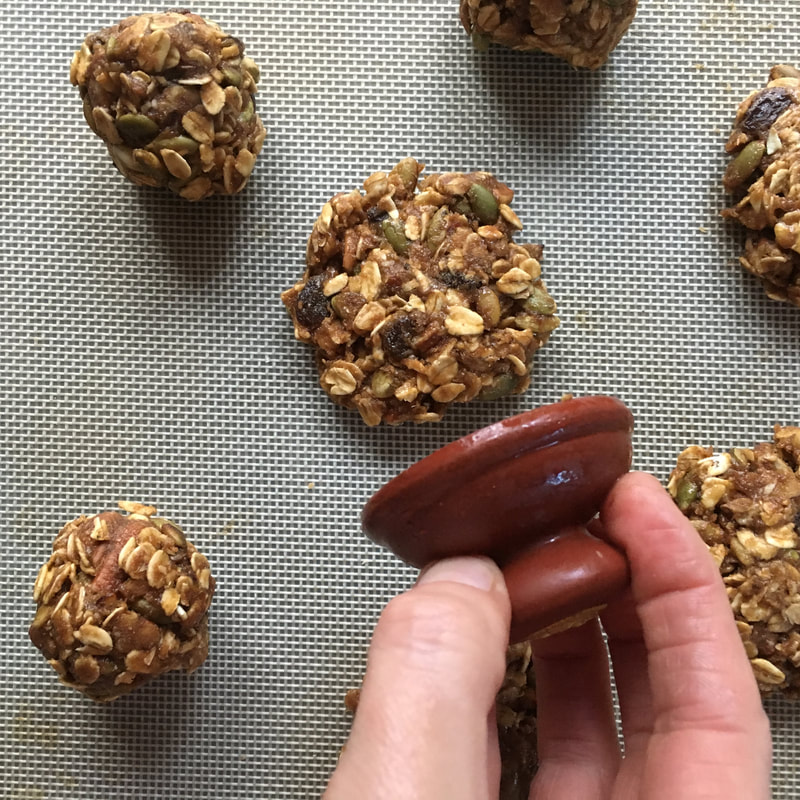
Taking a small dessertspoon of dough, roll into a tight ball the size of a walnut. You may find wetting your hands with water or oil may help at this stage. Place on a couple of baking sheets with room for spreading between each ball. Press each gently down with the base of a glass or biscuit press until they are 5-6cm in diameter.
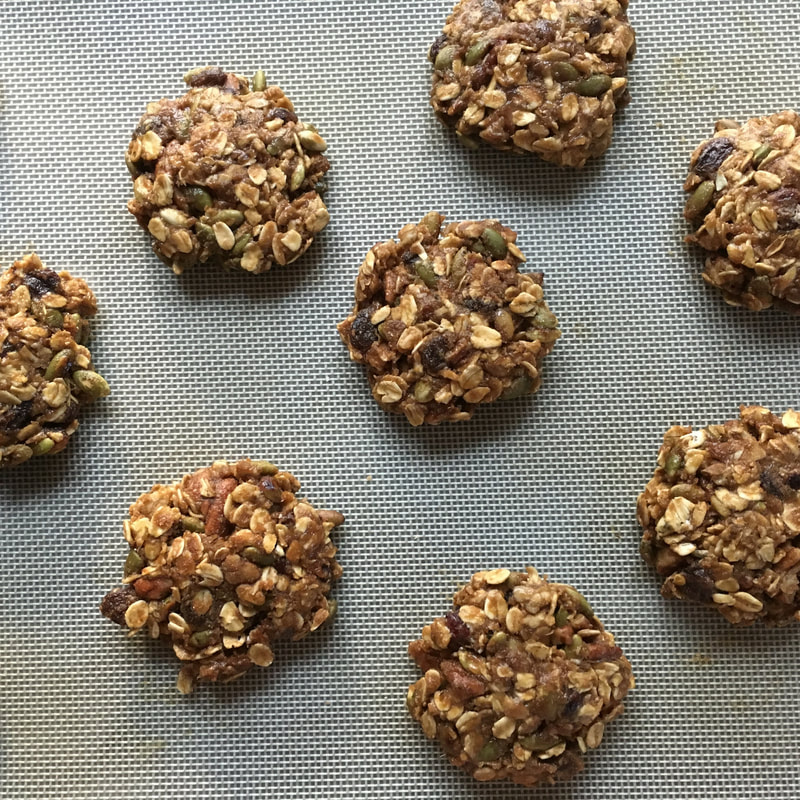
Bake at 180 degrees C for about 15-18 minutes. Leave to cool a little on the baking sheet before transferring to a cooling rack. When cool, store in an airtight container. The biscuits, if stored well, will remain crisp and fresh for 2 weeks or more.
 Shrove Tuesday or 'Fat Tuesday' as the Scandinavians would have it!! Whether you're planning to fast or not, a day to indulge. Countries across Scandinavia celebrate with variations of this Semla bun. Semlor are delicious sweet cardamom buns, enriched with butter and milk, then filled with a delicious honey almond paste and fresh cream. If you're a pancake traditionalist, why not try this alternative. Or if you're really planning on fasting, have both!
Semla buns (Makes 14-16 buns) Semla buns are a traditional Scandinavian treat, varying slightly across the region, but always served as part of a feast on ‘Fat Tuesday’, at the start of Lent. Much like our hot cross buns, although associated with a particular festival, they are so popular they can be found in bakeries for weeks beforehand. For the dough: Strong white flour 500g (or substitute for all or part white spelt flour) Milk 250g Fresh yeast 25g Sea salt 10g Butter, cubed 60g Caster sugar 60g Cardamom 7g Eggs 100g (2 medium, beaten) For the almond filling Ground almonds 120g Honey 45g Caster sugar 20g Milk 25g Plus, 350g double cream, whipped with 20g icing sugar Measure out your flour, sugar and cardamom into a large mixing bowl, then rub in crumbled yeast on one side of your bowl (for dried yeast use half the amount). Now place the salt on the other side of the bowl. Keeping your butter to one side for now, add your milk and eggs and mix with your scraper until all ingredients are combined and a rough dough has formed. Turn out onto your work surface and knead for 10 minutes or so, until you have a nicely elastic dough. Now add your butter and knead for another 5 minutes until your dough is fully developed. Form the dough into a ball and place back into your lightly floured bowl. Cover with a large plastic bag or a baking cloth and leave to rest for about an hour. After one hour, your dough should have roughly doubled in size. De-gas your dough and divide into two, take each half and divide into 8 pieces of approximately 60g-65g each. Being careful to slap any excess gas out of each piece and, using the friction of a flour-free workbench, form each piece into a tight little ball, being careful to place the seam on the underside, before placing on a lined baking tray to prove. Ensure you leave enough space between each roll to allow it to double in size. You may need to use two baking sheets. Cover and leave at a warm room temperature for about an hour (ideally, 22°C - 25°C), but do not place anywhere too warm. If your kitchen is a little cooler, just leave a little longer. After one hour, your rolls should be roughly double in size and will return slowly back to shape when depressed gently with a floury finger. Preheat your oven to 200°C. Just before baking, sprinkle a little flour over the top of each roll. Place them into your hot oven and then turn the temperature down immediately to 180°C. Bake for 10-12 minutes. The sugar content in the rolls will cause them to brown quicker than ordinary bread rolls, so do check they are not browning too quickly. If they are, you may need to turn your oven down by 10 degrees or so. Leave your buns to cool on a wire rack and meanwhile you can prepare the almond and honey filling and whip your cream in preparation for assembly. For the filling: Place your ground almonds, honey, sugar and milk in a bowl and combine until you have a kneadable paste. Divide your mixture into 16 (approximately 13g each) lumps, roll into tight balls and put to one side. Now take your cream and whisk together with a little icing sugar until you reach soft peaks, taking care not to over-whip your cream. Assembly: Once your buns have cooled, cut most of the way through your bun about one third of the way down, creating a ‘hinged lid’. Inside insert a disc of honey and almond paste made by flattening the balls you made earlier, and then spoon or pipe fresh cream on top, before gently closing the lid a little. Finish with a little sprinkled icing sugar. And there we have it! A delicious alternative to pancakes on Shrove Tuesday. Or any day! 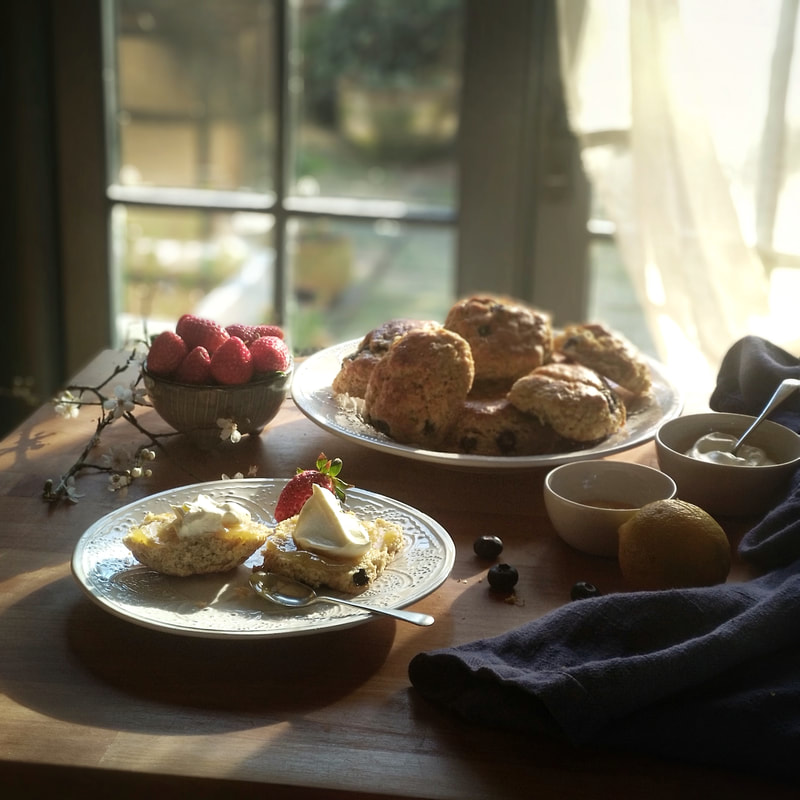 I'm often asked for recipes to use up that unused sourdough starter. I hate waste and, knowing many of you don't have the time to bake as regularly as you might like, inevitably there will be times when you have to discard unrefreshed starter before feeding your 'mother' in your weekly routine. With the unseasonably warm weather we've been having lately and blossom bursting out all over the garden, I was seduced into daydreaming about the summer and teas on the lawn. I found myself making up a batch of delicious lemony scones, bursting with tangy blueberries. Not exactly seasonal, I know, but I couldn't resist the bright colours of the berries on the counter of my local shop! Even the butterflies and bees have been fooled into thinking summer is on its way!
Now, scones are a very personal thing. I love them and fondly remember my mother's from my youth. I'm often drawn to them in cafes, but have learnt over the years that they frequently lead to disappointment, as I bite into one and get that familiar baking powder 'squeak'! I like my scones to be soft, light and moist. And utterly without squeak. A batch of these scones takes a matter of moments to put together - perfect for those short notice visitors or that urge for 'a little something' mid-afternoon, with a perfectly brewed cuppa. In fact, scones freeze beautifully, unbaked, so why not whip up a double batch? Place one tray in the oven and the other in the freezer. Once frozen, you can transfer them from the tray into a freezer bag or plastic box. When you want to bake them, defrost for 45-60 mins on a baking tray at room temperature and bake as normal. Even easier, for those last minute guests! Lemon & Blueberry Sourdough Scones (Makes 8-9 scones) Ingredients: 180g plain flour 80g wholemeal flour 100g unrefreshed liquid starter (100% hydration) 1 tsp bicarbonate of soda 1/2 tsp sea salt 90g golden caster sugar Zest 1/2 lemon 75g cold butter, either cubed or grated 1 tsp vanilla extract 150g buttermilk 150g blueberries (preferably small, firm and sharp-tasting) Method: Preheat oven to 180C Firstly, weigh out your flour, bicarbonate of soda and salt. If using a food processor, blitz the flour mixture with the cubed cold butter. Do not overwork. If mixing my hand, try grating your cold butter into your flour, then rubbing briefly together to get a better blended, breadcrumb-like mix. Do not worry if you still have and uneven distribution of butter, just ensure that there are no excessively large lumps. Now add your sugar, lemon zest and blueberries, mixing lightly with your hands to ensure an even distribution. In a separate jug or bowl, weigh out your unrefreshed liquid starter and buttermilk, together with your vanilla essence. Mix thoroughly, then add your liquid to your other ingredients. Mix together, until the dough just comes together - remember, the less you handle at this stage, the lighter your scones will be. Turn your dough out onto a lightly floured surface and use your hands to pat into a square, approximately 4cm high. Divide into 9 squares (3 x 3), cutting firmly with a dough cutter or sharp knife. Alternative, you can use your favourite cutter, to make round scones. Place on a baking tray and brush with a little beaten egg. Bake for 18-20 minutes, until golden brown. (Alternatively, if you have no blueberries, subsitute for 100g soft sultanas, for delicious lemon and sultana scones). When cool, serve with fresh cream and homemade lemon curd. We make hot cross buns every year, but this year I thought I'd take a look at the tradition, where it comes from and look at a more traditional recipe to our normal fare. So, I dug out my trusty Elizabeth David English Bread and Yeast Cookery. Published in the '70s, it's a weighty tome, but a great start when you really want to get to grips with something. I was rewarded with a wonderful verse of the well known rhyme that was previously unknown to me: One for the poker, Two for the tongs; Three for the dust pan, Hot Cross Buns! Thanks to modern technology, I lost none to the poker, tongs or dust pan. Following her guidance ,my resulting dough was stiffer than I would usually make, but no less soft and tender. I made some traditional deep crosses in the dough after proving and then piped the sweetened flour paste into the grooves. I was delighted with the results and think I'll stick with this method in future years. As for the tradition itself, it seems it predates even medieval times. Evidence of fruit -studded loaves made to celebrate Eastre and the rites of Spring go back to pagan times. Then, as is so often the case, Christianity took over the pagan traditions. The crosses were a later addition, and were commonly cut into all manner of buns, loaves and cakes by superstitious bakers (for superstitious customers!) as a way of warding off evil spirits (that were naturally responsible for turning them mouldy). Then, during the reign of Elizabeth I, when the puritans were trying to rid England of all evidence of 'popery' as they saw it, the use of the cross was strictly limited and the practice was abandoned. However, one exception was made. At Easter, the use of the cross as a symbol was seen as appropriate and so the tradition of a little fruited loaf with a cross on continued. Traditionally, the cross was a haphazard, deep-cut marking but as time moves on we see embellishments appearing in the form of pastry or citrus peel crosses overlaying the scored cross. These days, you can see the piped cross on most modern buns. And, of course, everyone outdoes each other to come up with a new and exciting flavour not thought of before. For me, these traditional buns are an absolute delight. In fact, next year I might just try those candied peel crosses. If it ain't broke...  Hot Cross Buns
(makes 12 generous buns) Ingredients 650g Strong white bread flour 60g Wholemeal flour (wheat, spelt or rye) 65g Light brown sugar (or golden caster sugar) 200g dried fruit (sultanas, raisins, currants & mixed peel) 360g whole milk, at room temperature 90g cold butter (unsalted), cubed 1 egg 30g fresh yeast (or 15g dried yeast) 15g salt 1 tsp mixed spice Paste for crosses: 60g flour 20g caster sugar 50g water Glaze 2 tbsp milk 2 tbsp caster sugar Method Place the egg and milk in your mixing bowl, then add your flour, sugar, spice and salt. Now crumble the fresh yeast into your flour, avoiding direct contact with the salt. Using your dough attachment, mix your dough on low speed for 1-2 minutes until smooth and well combined. Turn the speed up to medium fast and mix for a further 2-3 minutes until your dough is strong and elastic. Now you have developed the gluten, you can throw in the cubes of butter a few at a time, continuing to beat the dough. When the butter is all combined and your dough is smooth once more, you can add the dried fruit and mix in. Now cover and rest your dough for about 1 1/2 hours until doubled in size. You can then turn out your dough on a lightly floured surface. De-gas and divide into 12 equal portions (about 120g dough each). Shape each piece of dough into a ball and place on a baking tray lined with baking paper. Cover and leave to prove for a further 2 hours (if your kitchen is warm, you may need less time; if cold, you may need more). Meanwhile, prepare your paste for the crosses. Mix the flour, sugar and water together and place in a piping bag, with either a small nozzle or prepare to cut a small hole at the end of the bag. Preheat your oven to 220C When your buns are proved, pipe a narrow cross on each bun. If you have placed your buns in a 3x4 grid, you may find it easier to do this by running down the entire row of buns, rather than each individual one. Place them in the oven and immediately turn your oven down to 190C. Bake for 15-20 minutes, keeping an eye that they don’t brown too quickly - if so, turn your oven down by about 10 degrees. Whilst your buns are baking, prepare your final glaze. Mix together 2 tbsp milk with 2 tbsp caster sugar in a saucepan. Heat gently until the sugar is dissolved. Allow to cool a little before using. When the buns are baked and golden, place on a cooling rack and brush with your milky glaze. Allow to cool, but maybe just one won’t be missed whilst they’re still warm. After all, you were the one to bake them. It’s the least you deserve. Enjoy! Happy Easter! |

Our workshops are run by award-winning sourdough baker Helen Underwood.
Categories
All
Archives
November 2023
|