
 Fluffy sourdough pancakes!
|
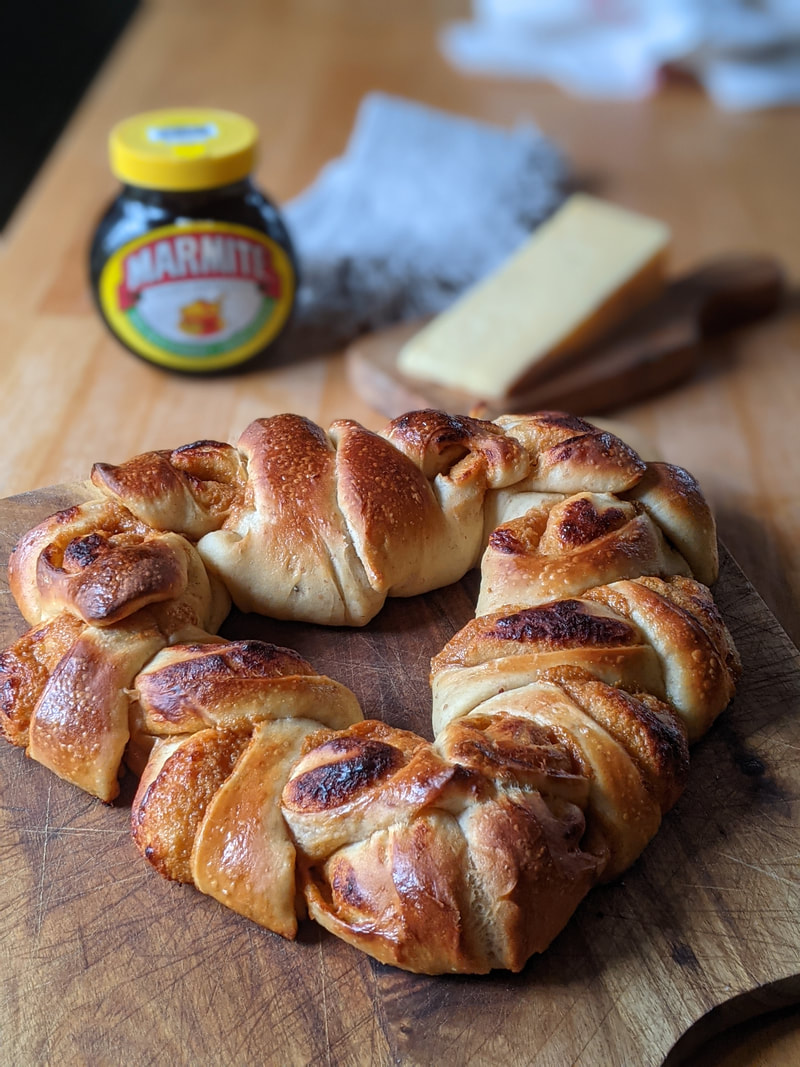
| Ingredients (Makes 2 hearts) For the dough: 450g strong white flour 50g wholemeal flour, eg spelt 2 large eggs 200g whole milk 2 tbsp runny honey 50g unsalted butter, melted 7g instant dried yeast 10g fine sea salt For the filling: 150g cream cheese 100g finely grated cheddar 50g yeast extract (eg Marmite) 1 egg, beaten to glaze. | |
Method
To make the enriched dough, place your flours in a bowl and add the yeast. In a jug, mix together the milk, honey, eggs, melted butter and salt. If using a mixer with a dough hook, place the liquid into your mixing bowl, then add your flour and yeast. If mixing by hand, you can pour the liquid ingredients into your bowl of flour and yeast. Mix together with a plastic scraper, until you have a formed a rough dough.
Turn out onto your counter and knead for approximately 15 minutes until you have a smooth and elastic dough. In a mixer, this will take half the time. Form into a ball, then place back in your bowl and cover. Leave at ambient temperature to prove for about 1.5 hours until the dough has roughly doubled in size. If your kitchen is cool, it may take a little longer.
Whilst it is proving, make the filling. Take 150g of cream cheese – any type, even mascarpone, whatever you have to hand – and add 100g of finely grated good cheddar – the sharp, flavourful mature kind. Now add about 50g Marmite (or any brand of yeast extract).
When ready, turn your dough out onto the counter and degas by slapping with the flat of your hand to remove any gas bubbles. Divide your dough into two equal halves, for the two hearts you will make. With a dusting of flour beneath, roll out each piece dough into a rectangle, approximately 25 x 40 cm. Using a knife or dough divider, cut into two rectangles 25cm x 20cm. Alternatively, if you have the space, you can roll out the entire piece of dough into one rectangle 50cm x 40cm and divide into 4 equal quarters. The resulting pieces of dough, 25cm x 20cm, will be the same.
Take your filling and spread half over each of the rectangles, being careful to leave about 1.5cm border all the way round. Now roll up each rectangle carefully, running a little water along the last edge, to seal the dough. You should end up with 4 long sausages of dough. Take each one, and making sure the dough has stretched evenly all the way to the end (pull the corner gently up if it has not). Pinch the ends together (wet a little inside if they are too floury to stick). Roll the ends in your two hands until you have created a sharp point at each end. Now gently roll each one to ensure the seam is secure, then taking each end gently stretch each roll until it is about 30cm long, taking care to stretch it evenly all along the roll. The gluten you have developed should make this stretch easily achievable.
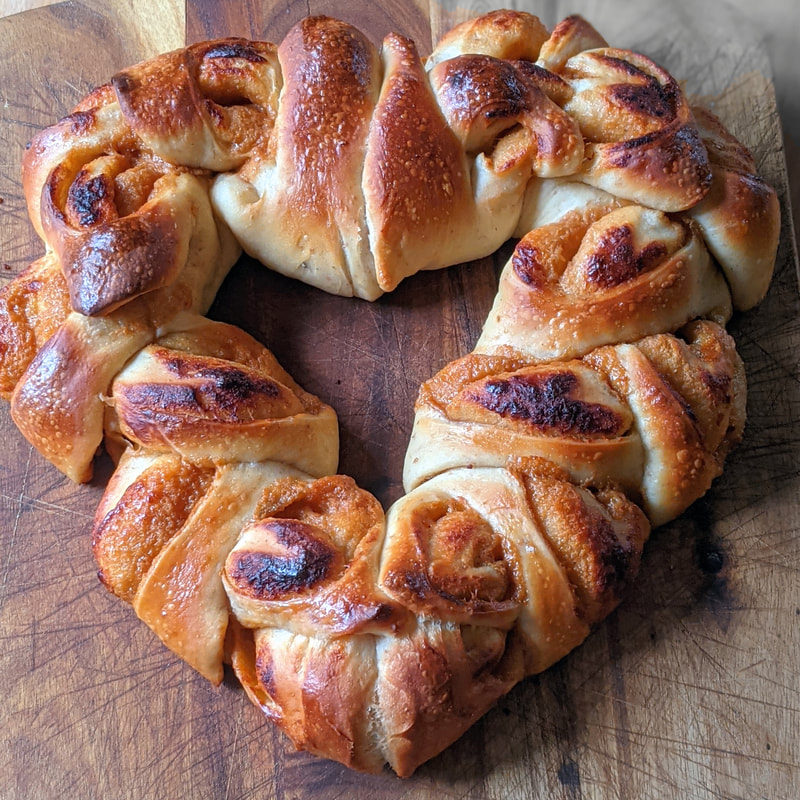
| Take one roll and shape like a cup handle, with the seam underneath. Take another and make the mirror image and place the two together on a baking tray, pinching together the two joins, both top and bottom. Now do the same for the remaining two rolls. Bear in mind, the dough hearts will double in size whilst they prove for a second time, so place on separate baking trays to give them plenty of space to grow. Cover the two hearts with cling film or a plastic bag whilst they prove. If you wish to bake the same day, leave at ambient temperature for 1.5-2 hours until they have appreciably grown in size and return slowly back to place when poked gently with your finger. If you wish to bake fresh in the morning, simply cover and leave in the fridge overnight for 8-12 hours and bake straight from the fridge (no need to bring back to room temperature). | 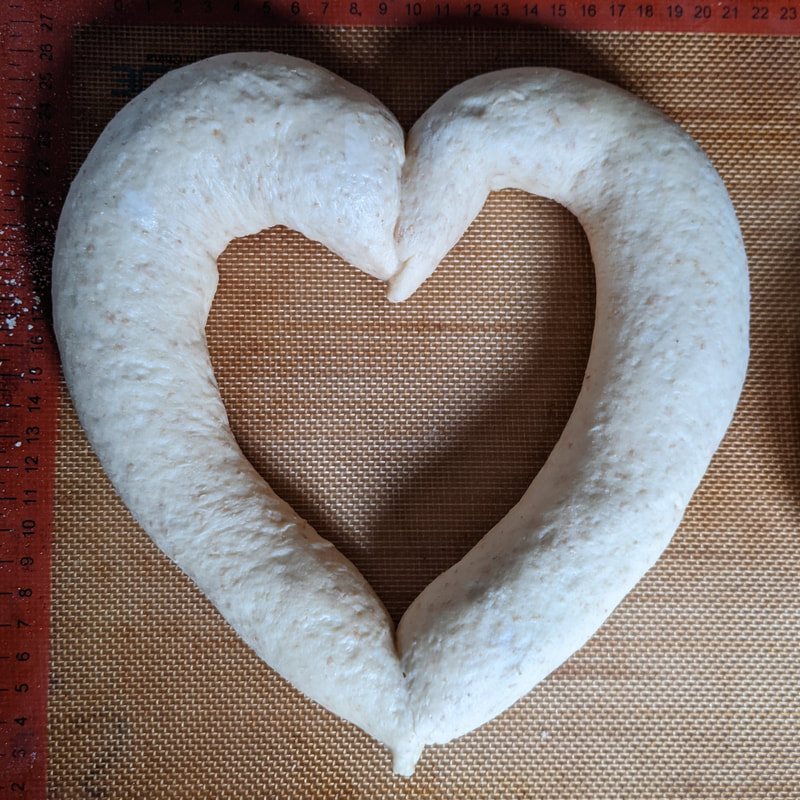 |
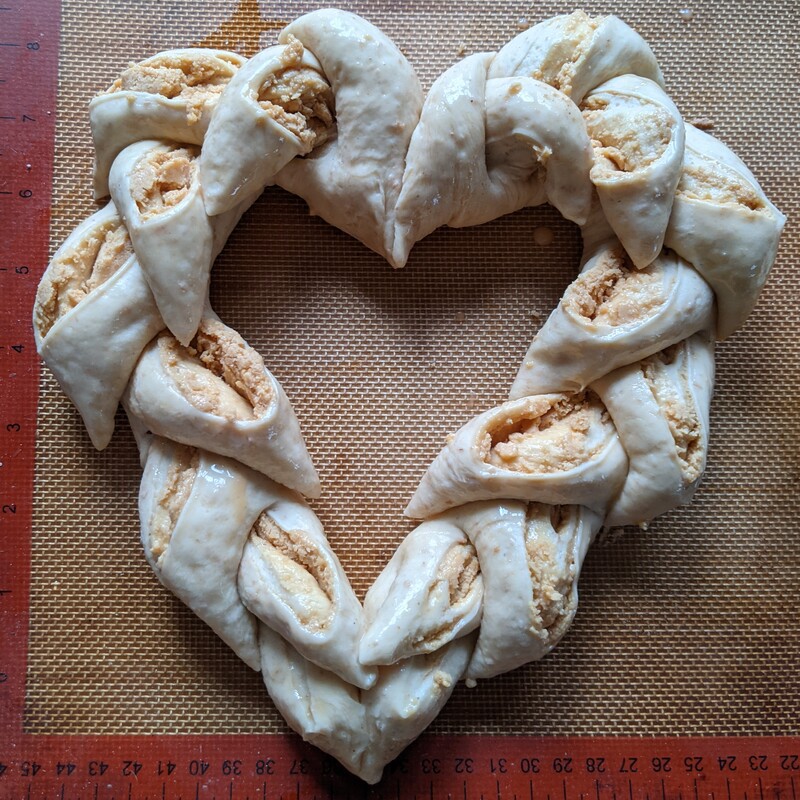 | Half an hour before you are ready to bake, preheat the oven to 220C. Then, just before you bake it is time to cut the each half of the heart, épi de blé style, with scissors. Holding the scissors very flat and snipping in line with the dough, following its curves, flip each cut alternately left then right. Finally, brush each with a little beaten egg, then place into the preheated oven. Immediately turn down the temperature of the oven and bake at 190C for about 20-25 minutes until golden brown and the centre of the dough has reached a temperature of 95C. Allow to cool on a rack. The hearts freeze well, due to fat content within the dough so you can always make ahead of time. You can re-bake straight from frozen in a hot oven for 10 mins or so, ready to tear and share whilst still warm or leave to cool once more on a rack. |
If you’re not a huge Marmite fan, you could add some chopped jalapenos with the cheddar and cream cheese instead. Or why not make a sweet cinnamon version, creaming together 150g softened butter, 100g soft brown sugar and a couple of teaspoons of ground cinnamon? Better still, make one of each!
 |
A little project for you or the kids. Or maybe you and your kids – make your own family of hedgehogs!
Kids can’t go wrong with dough. It’s doughty stuff! They can push it, pull it, tear it, thump it, drop it, throw it and it will thrive! Make this a fun activity at the weekend, or why not make it part of home-schooling when you need a break from relentless screen and book work, and tie it in with the science curriculum?
Did you know yeast is a fungus? It’s also known as sugar fungus (saccharomyces). All you need to make bread is flour, water, yeast and a little salt. Easy, huh? So easy, in fact, we’ve been doing it for thousands of years – on hot stones, in clay or iron pots, on ashes, in the ground under ashes... So, a modern oven and some ready dried yeast should make it a doddle!
To start producing the bubbles of gas to rise your bread, the yeast needs some sugar to feed on. It’s its best thing. And flour is full of it, but it’s all locked up in bigger starch molecules and the yeast can’t get to it. Once we add the water, the starch structures swell, allowing enzymes in the flour to work on the starch and break it into simple sugars. Yeast feasts on the sugar and produces carbon dioxide as a waste product. If bread was a liquid (like beer!) we’d see the bubbles rising to the surface, but in bread, it gets trapped by the stretchy gluten structure which fills like balloons within the dough.
Your job is to knead the bread to create the stretchy gluten ready to trap the gas and then wait until each ‘balloon’ has filled, so your bread is light and fluffy. Mostly, nature is going to do all the hard work for you.
All you need is some bread flour, a little salt, some ready dried yeast and some tap water. You don’t even need scales – you can cheat with a coffee mug and a teaspoon. Have fun!
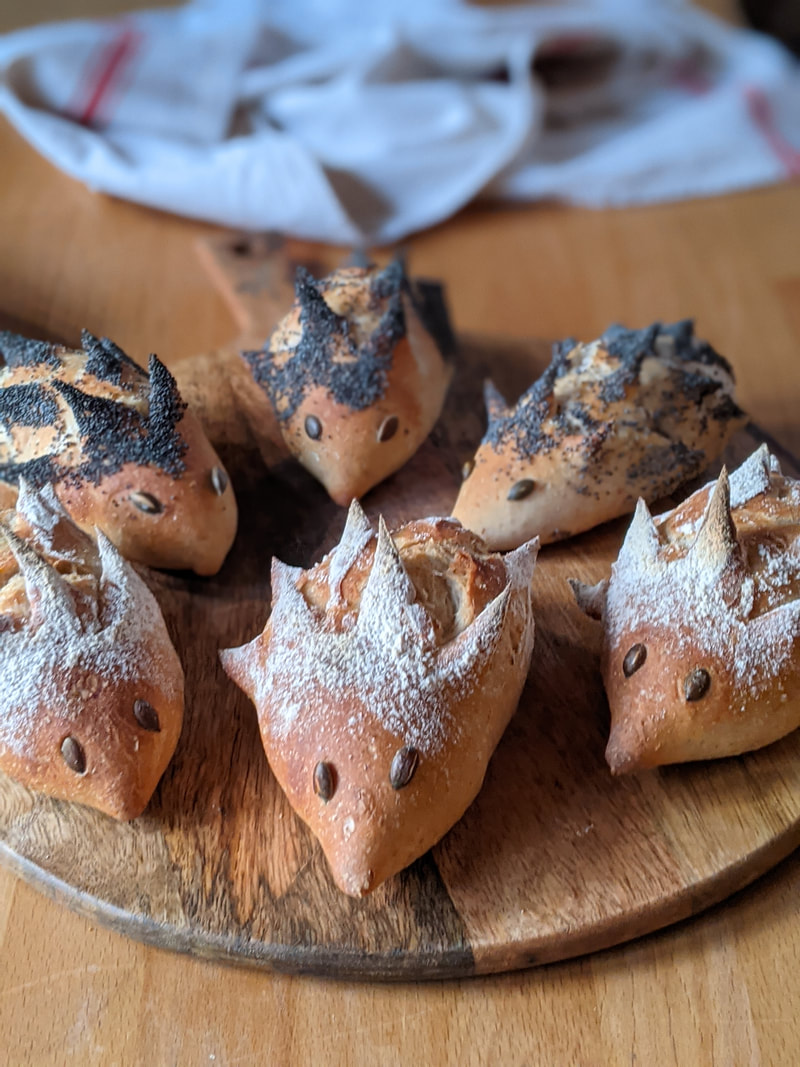
| Ingredients 750g strong white flour 450g tepid water (ie vaguely warm to the touch) 7g (one sachet) instant dried yeast 12g fine salt Or, if you don't have scales: 2 ½ x coffee mugs, loosely packed strong white flour 1 x coffee mug tepid water (full, to brim) 1 x 7g sachet fast action ready yeast 1 heaped teaspoon fine salt Method: Mix all your ingredients in a bowl until you have a rough dough and no loose flour left. Tip it out onto the counter and knead the dough for about 10 or 15 minutes until it’s smooth, elastic and stretchy. There are lots of ways to knead dough, but as long as you continuously push or pull the dough and then fold it back over itself, you’ll be developing that gluten. Once your dough is kneaded, form into a ball, put in a flour dusted bowl & cover with a cloth for about 1.5 hours until it’s doubled in size. Now remove the dough, slap it with the flat of your hand to remove all the gas before you divide it into 10—12 equal pieces of dough.  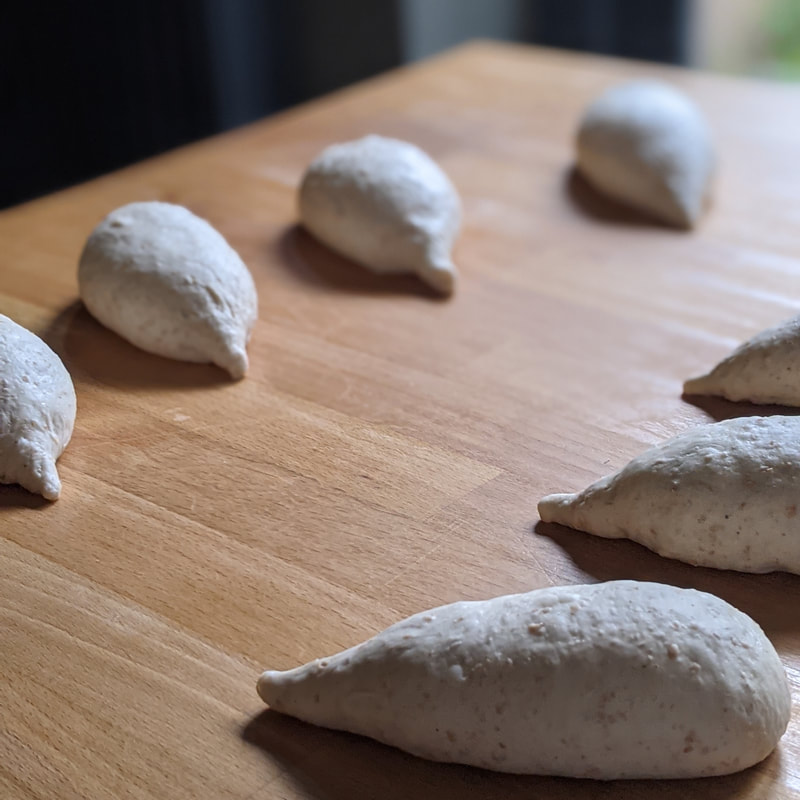 | 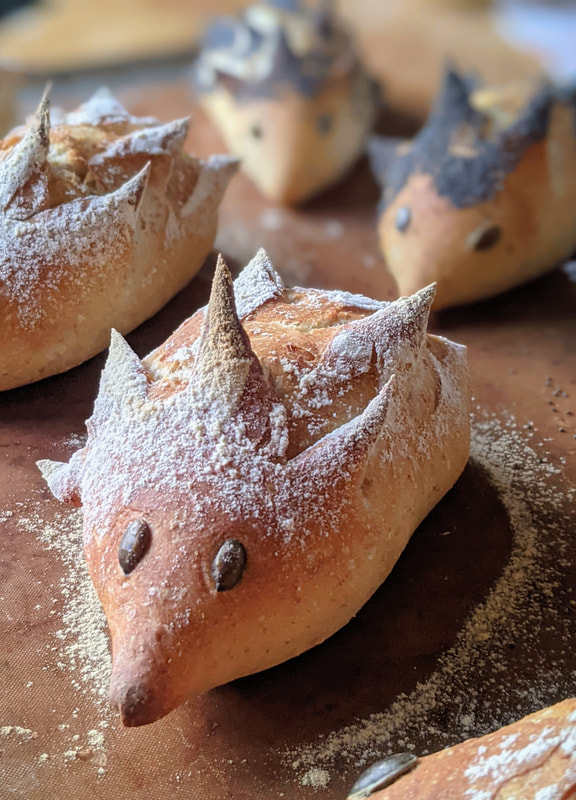 Shape each piece into a little round ball with a smooth top, taking care to squish out any bubbles that appear at this stage (plenty of time for more bubbles to grow as it proves for a second time). Now take a ball and fold over itself so you have an oval shape. Finally, roll one end to a long point for the ‘snout’ of your hedgehog. If you want to add seeds, now is the time. Dampen a cloth, roll your hedgehog’s back on the cloth, then roll it on a plate of poppy or black sesame seeds. Place each one on a baking tray, remembering to space well out as you want them to double in size. Cover again with a cloth and leave to prove for another 1.5 hours. Remember, yeast feeds more slowly if it's cold, so give it a little longer on a cold day or if your kitchen is cool. Never be tempted to hurry things along in an airing cupboard. They're usually much too warm! The yeast will be happy if you just let it take its time. 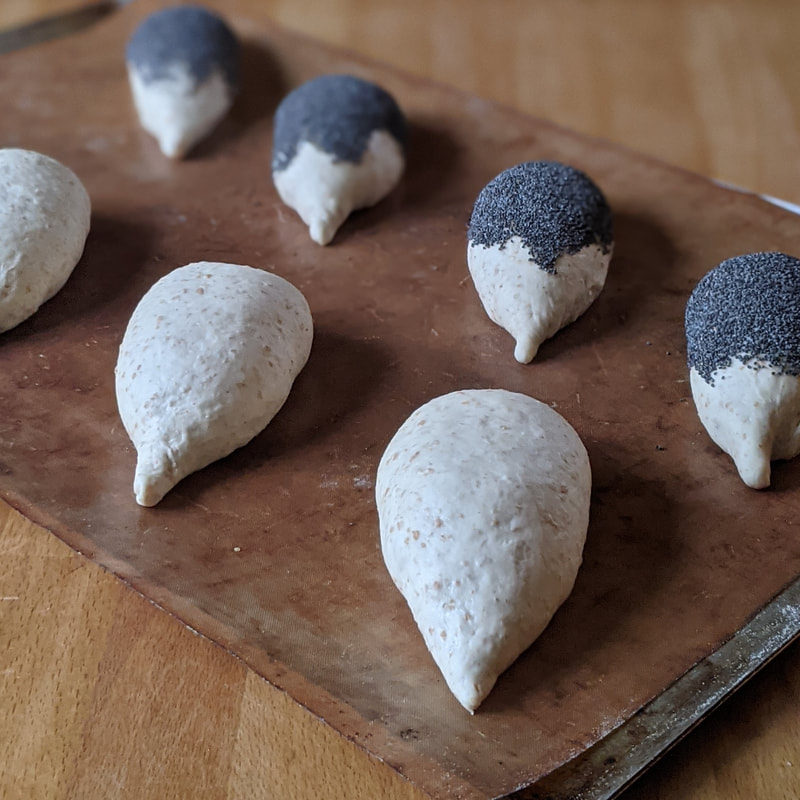 |
Bread is baked in a really hot oven, so make sure you preheat your oven to 240C at least 20 minutes before you need to use it. Perhaps set a timer for 1 hour after you have shaped your hedgehogs to remind you to turn it on.
When your little rolls are ready, they will have roughly doubled in size and when you gently press the dough it will bounce slowly back. If you wish to, you can add a couple of pumpkin seeds or currants for eyes. For those you haven’t covered in seeds, you can sprinkle a little flour on their backs.
When your little rolls are ready, they will have roughly doubled in size and when you gently press the dough it will bounce slowly back. If you wish to, you can add a couple of pumpkin seeds or currants for eyes. For those you haven’t covered in seeds, you can sprinkle a little flour on their backs.
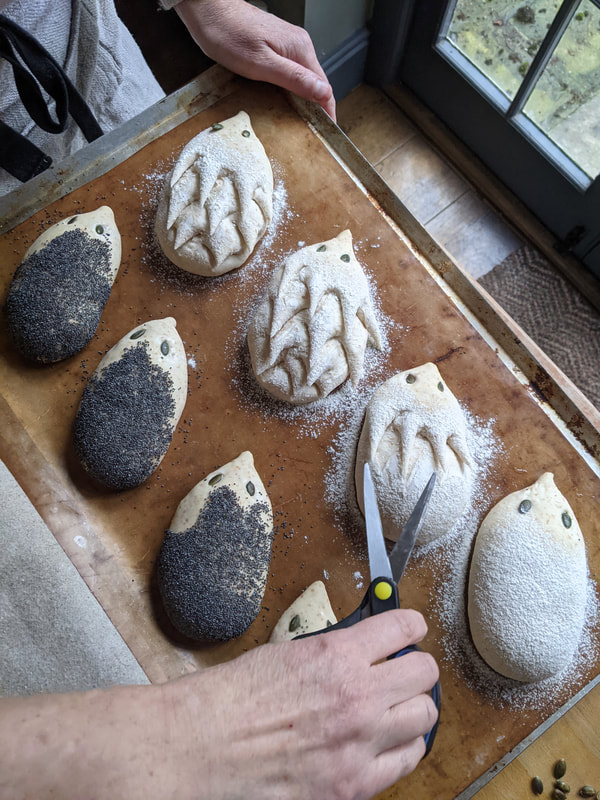 | 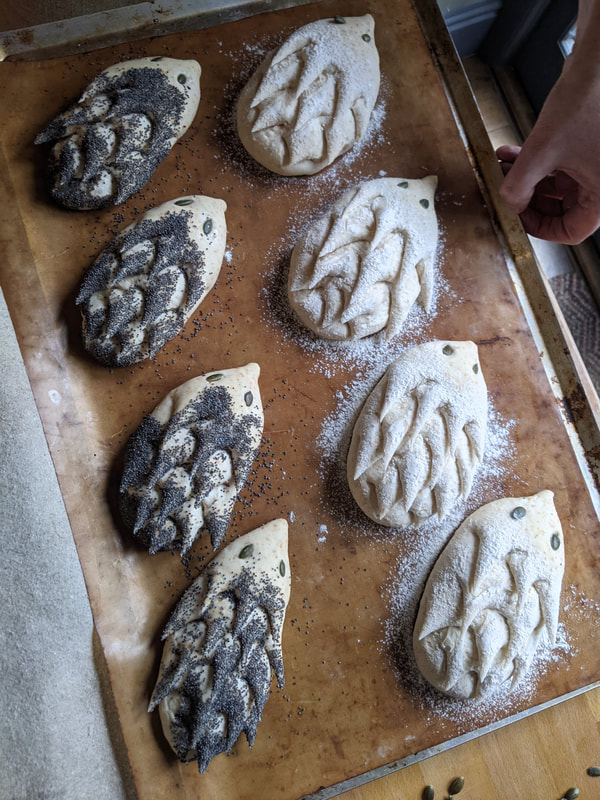 |
Before they go into the oven, we have to cut the hedgehogs’ ‘spikes’. To do this, hold your scissors almost horizontally and cut row upon row of spikes. You will cut them flat, but they will spike up as the dough springs up in the oven.
As the tray of rolls go into the oven, throw half an eggcup of water onto the bottom of the oven to provide some steam. Close the oven door and turn the temperature down to 220C and bake for 15-20 minutes until golden brown. The longer the bake the crisper the crust, so feel free to leave them in longer – just watch the tips of your hedgehogs’ spines don’t burn!
Allow to cool on a rack – a clean grill pan will do as long as air can circulate and allow the steam to escape from the roll or you’ll find the bottoms will be a bit soft and soggy.
Once cool, you can bag up (and freeze) any you don’t want straight away.
How will you eat yours? Tear off the spikes and dip into something delicious or cut open and fill with your favourite sandwich filling. How about hedgehog hotdogs? Have fun and happy baking!

Our workshops are run by award-winning sourdough baker Helen Underwood.
Categories
All
Awards & Press
Events
News
Recipes
Specials
Archives
November 2023
April 2023
February 2021
January 2021
August 2020
July 2020
June 2020
May 2020
April 2020
March 2020
October 2019
September 2019
April 2019
March 2019
February 2019
January 2019
April 2018
March 2018
December 2017
October 2017
September 2017
April 2017
February 2017
January 2017
November 2016
October 2016
September 2016
August 2016