WHITE COTTAGE BAKING SCHOOL
  • Home
  • About Us
    • About White Cottage
    • Blog
    • Contact Us
  • Resources
    • Recipes
    • "How-to"s >
      • Making & Refreshing a Starter
  • Workshops
    • Recommended Reading
    • About Our Workshops
    • Book Workshops
    • Workshop Calendar
    • Terms & Conditions
  • Residential Retreats
    • Baking Retreat, Tuscany, Italy
  • Poacher's Cottage
  • Corporate
    • Hospitality & Teambuilding
    • Reviews & Awards >
      • Awards & Press
      • Workshop Reviews
    • Industry Training
  • Terms & Conditions
Picture

caramelised apple cake with pecan streusel topping

19/1/2021

Comments

 
Picture
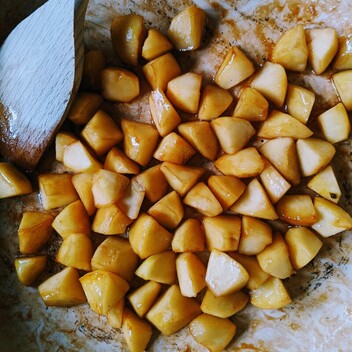
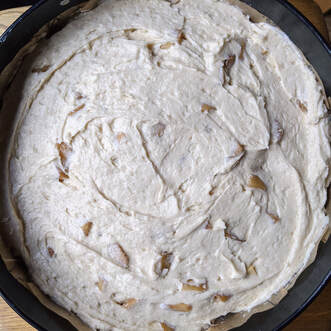
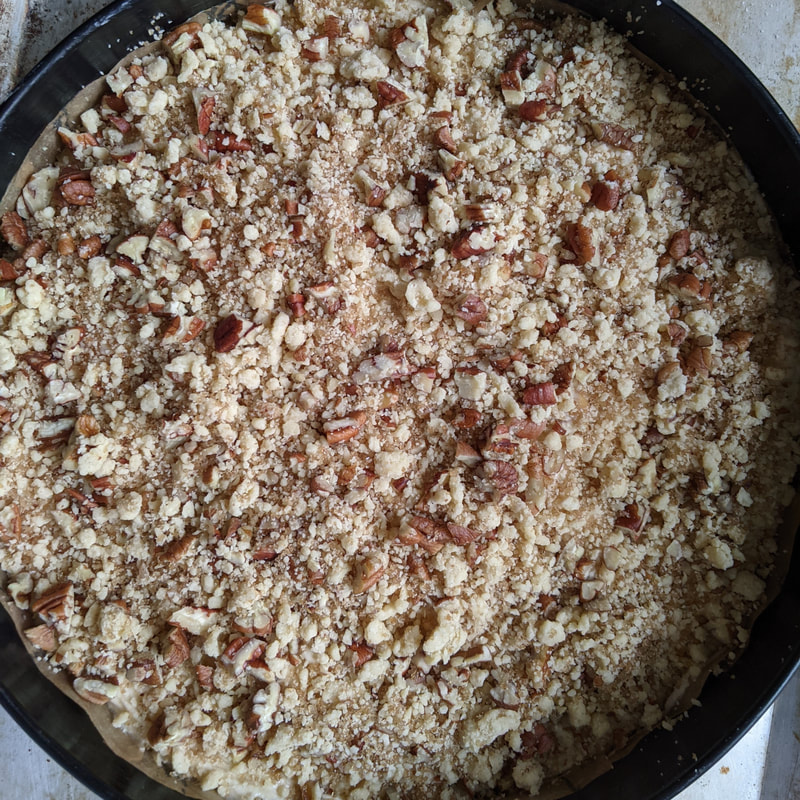
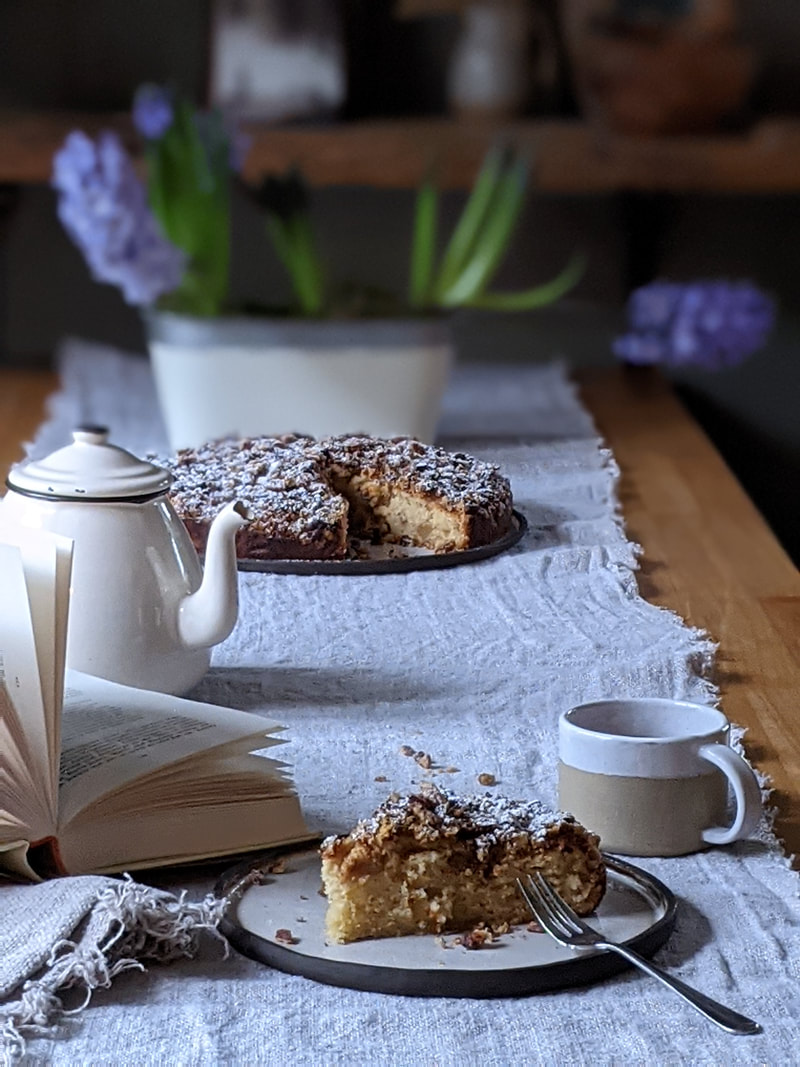
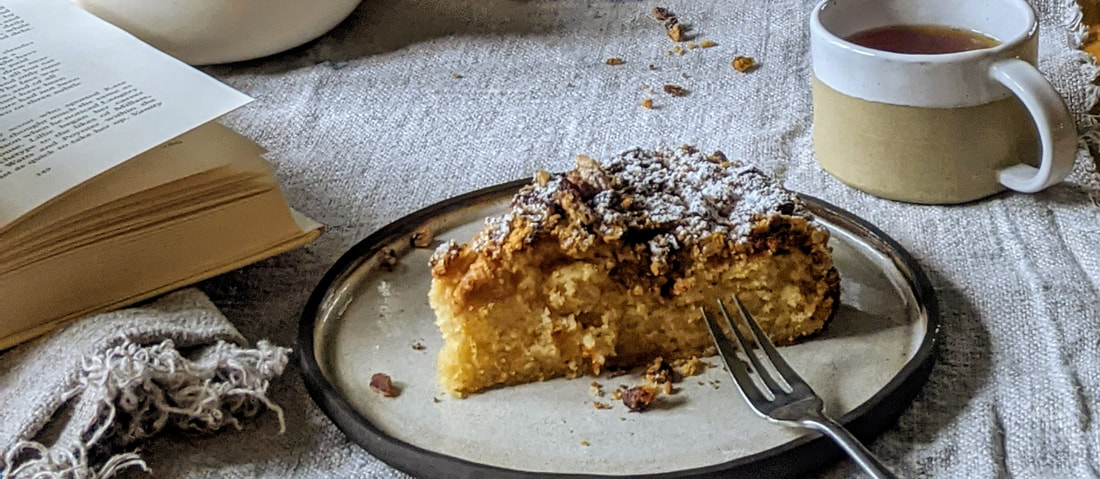
Apple cake with streusel topping
 
Delicious any time of year, this recipe was dreamt up in Winter in remembrance of snowy days during a relentless grey and dreary January. Each year, for many years, our little family has visited a favourite restaurant in a cosy wooden cabin, usually buried deep in snow and hidden half from view, on the French/Italian border. We usually steal a march on the lunchtime trade by dropping by late morning for a warming drink and a slice of the best apple cake I have ever tasted. We take our treasure and savour it en plein air, under the bluest of blue skies. In lieu of that for now, and hankering as I am for those bright, sunny, carefree days, I have baked my own version. It's close but I'm not sure anything will be quite up to the memory (it really is the BEST cake!). Perhaps I just need the snow under my feet, the warmth of the sun on my face and my lungs full of the that crisp, clean Alpine air...
 
Ingredients:
(Makes one round cake, 23cm-27cm diameter, or 20cm-23cm square tin )
 
For the caramelised apples:
3 dessert apples, sharp and crisp (eg English Cox), peeled, cored and cut into chunks
20g butter
20g brown sugar
 
For the streusel topping:
50g salted butter, room temperature
75g self-raising flour
50g demerara sugar
75g pecans, roughly chopped
 
For the cake batter:
250g self-raising flour
1 tsp baking powder
½ tsp fine sea salt
250g golden caster sugar
200g unsalted butter, softened
3 large eggs
1 tsp vanilla bean paste (or extract)
150g Greek yoghurt
Zest ½ lemon

​Prepare your chosen round or square cake tin by lining and greasing well. A smaller tin will produce a taller cake, but keep within the size guidelines.  Preheat your oven to 350F/180C (160C fan).
 
First prepare your apples, by melting the 20g butter and sugar together in heavy bottomed pan and allow to caramelise. Add your chopped apples, coat in the caramel and cook on a medium heat for 5-6 minutes, turning occasionally. Transfer to a plate and leave to cool.
 ​
Now prepare your crumble topping: rub the room temperature butter into the flour lightly with your fingertips. You don’t need to ensure even ‘breadcrumb’ texture as you want a varied crumbly texture. Add the demerara sugar and mix evenly. Set to one side with the chopped pecans.

​To make the cake batter, sift together the salt, baking powder and flour. In another bowl, cream your sugar and butter together until pale and fluffy – 4-5 minutes.​ ​
Picture
Picture
Sprinkle the chopped pecans over the top and, lastly, the streusel topping.

Place on the middle shelf of the oven and bake for 50-60 minutes. The cake will be cooked when the top is firm and a skewer comes out clean. Or, better still, use a probe thermometer. The cake will be cooked when the thermometer reads around 96C-98C. If you bake a cake to temperatures beyond this the moisture will be start to be lost and your cake will begin to dry out.
 
When cooked, remove the cake from the oven but leave in the tin for 10 minutes or so, before placing on a wire rack to cool.

Delicious warm or cold, and wonderful with a dollop of sour cream or Greek yoghurt.

​Pour yourself a cup of tea, find a good book and just take five!
​Now whisk your eggs together and gradually incorporate into your creamed butter mix. If you mix in 5 or 6 additions they egg shouldn’t curdle, but don’t panic if you add a little too quickly and the mix does separate a little. All will be well! 

​
Whisk in your Greek yoghurt, lemon zest and vanilla until smoothly incorporated. Now switch to a metal spoon and gently fold in your remaining dry ingredients about a quarter at a time, working as little as possible to establish a homogenous mix. If the mix seems a little too stiff, you can let down the mixture by adding a tablespoon or two of milk. This may happen if your Greek yoghurt is particularly thick – the texture varies greatly from brand to brand, or even batch to batch!

​Finally, gently fold in your cooled caramelised apples and
pour/spoon the batter into your prepared tin. ​
Picture
Picture
Comments

flour tortillas

12/1/2021

Comments

 
Picture
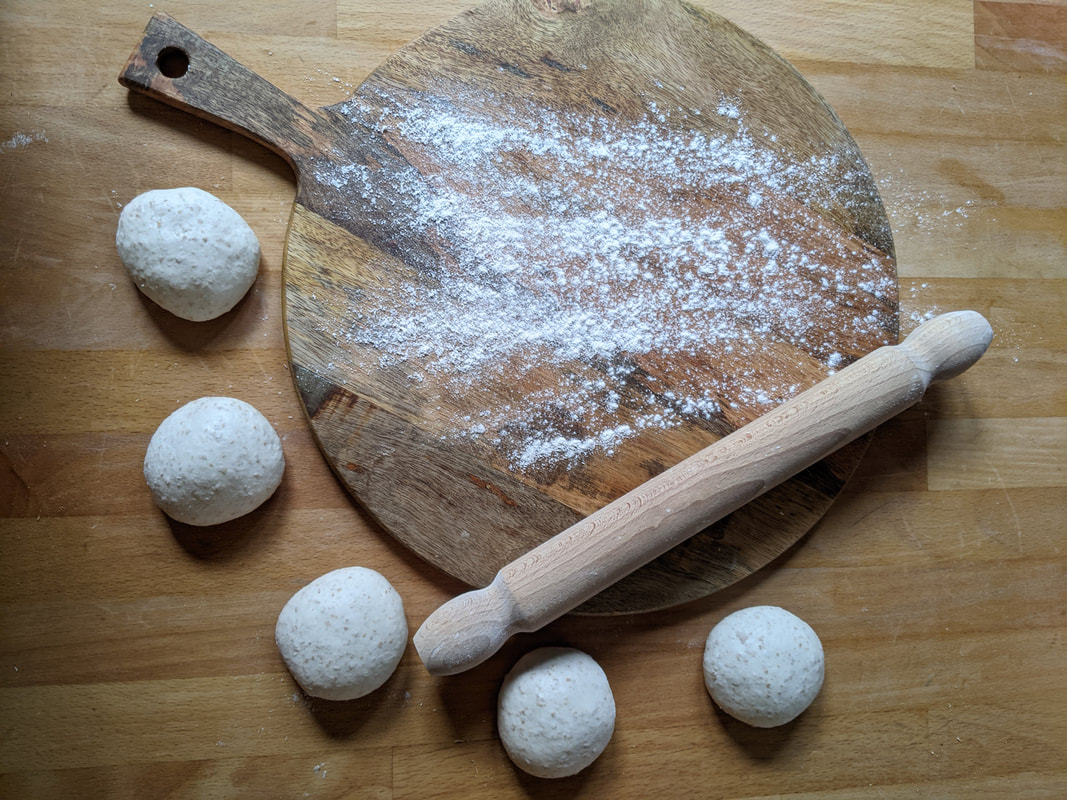
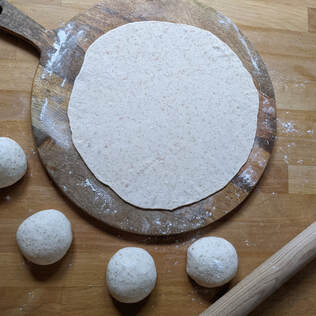
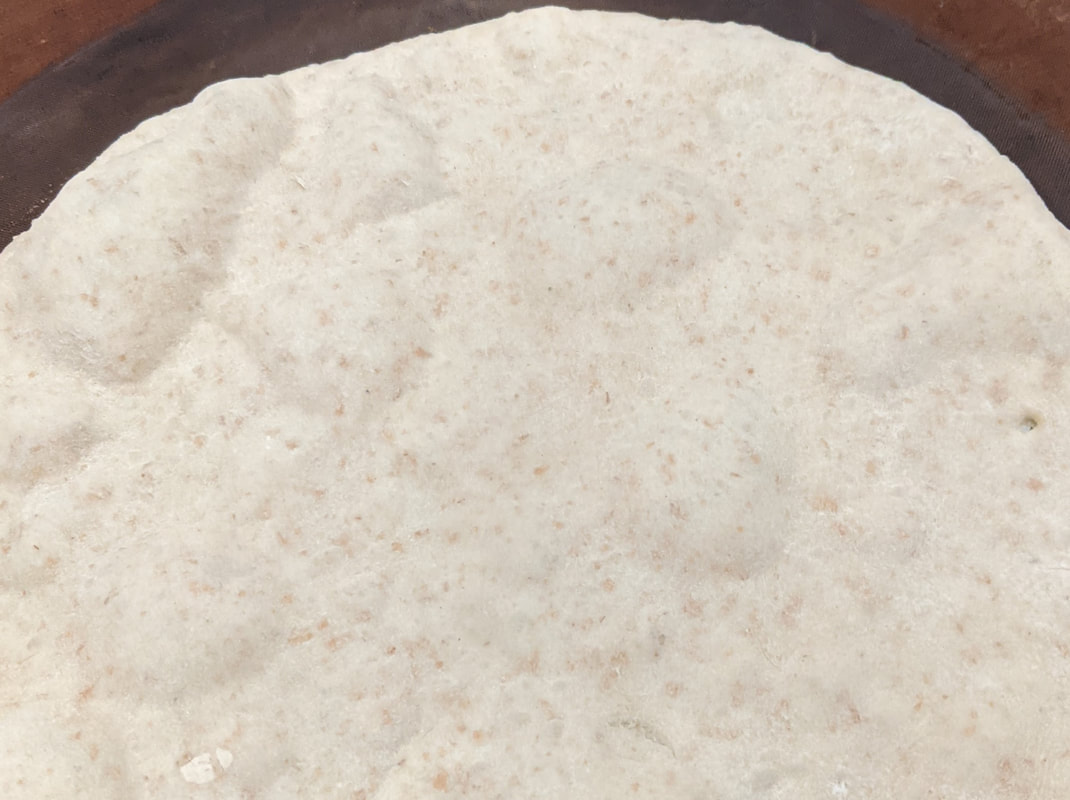
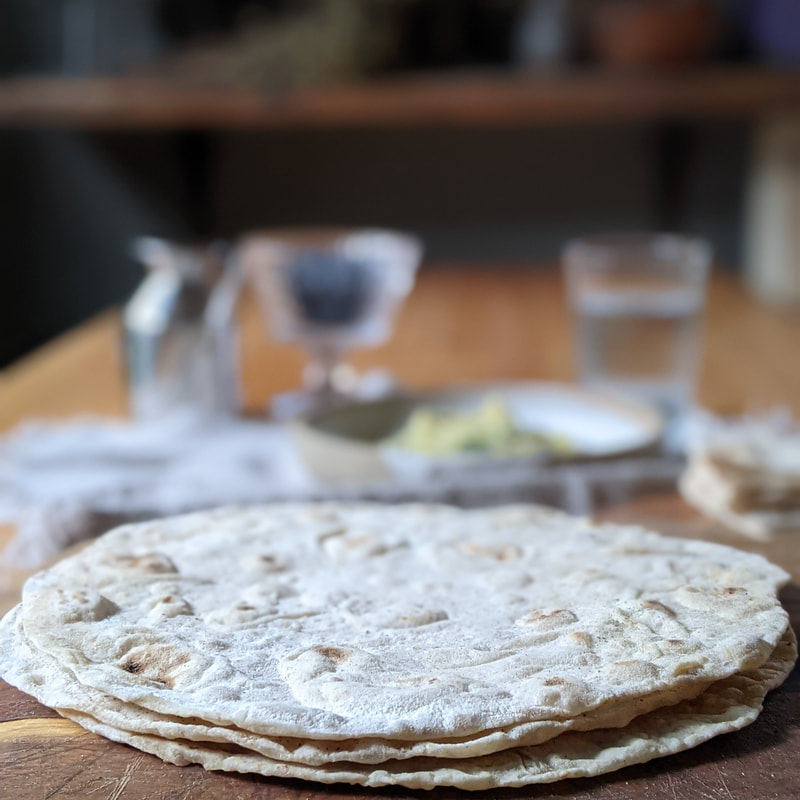
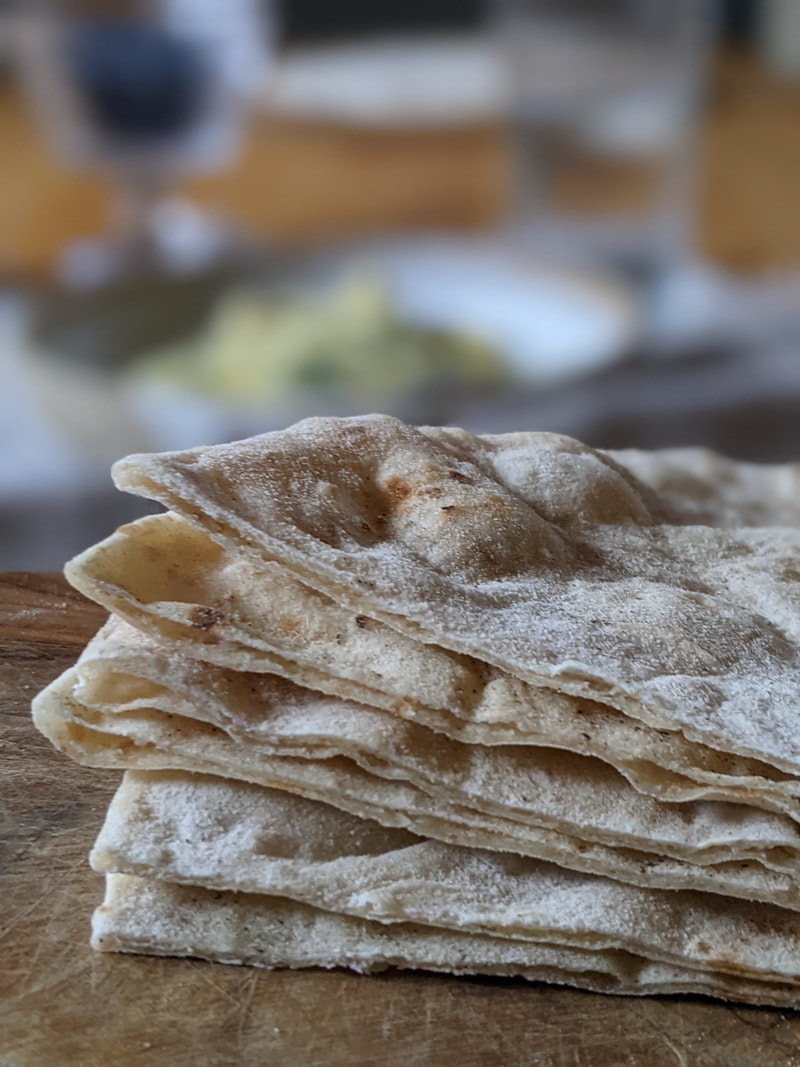
Flour tortillas
 
A quick, easy and versatile flat bread, the tortilla can be used for wraps, dips, quesadillas etc. They can be rustled up for an emergency lunch or supper without planning ahead of time which make them super useful when you feel like you're feeding the five thousand and really can't face another trip to the shops! No need for fancy equipment like a tortilla press - these will be easily rolled with a rolling pin as the wheat flour produces an elastic dough. Tortilla presses are used for traditional corn tortillas which are naturally gluten free and have no such elasticity.
 
Feel free to use all plain flour if you have no wholemeal in the cupboard. 
 
Finally, for best results use lard (or vegetable shortening) but you can use butter if you don't have any to hand.
 
We like to use up old sourdough starter in our bakery recipe, but if you don't keep a starter, replace the starter with 75g of extra water plus 75g of extra white flour. This is an almost instant recipe — ready and baked in little more than half an hour, but you can keep the dough wrapped in the fridge for 2-3 days. It is not strictly unleavened, as we use a little baking powder which supplies a little lift on the griddle, giving a lighter, almost flakier, layered tortilla. 

Ingredients:
(Makes 6 tortillas)
200g plain flour
1 tsp baking powder
1/2 tsp fine sea salt
15g lard (or vegetable shortening)
160g water
150g liquid starter (unrefreshed, but not too acidic. Ideally, 2-3 days old)*
*or substitute 75g flour + 75g water 
Method:

Sift together the salt, baking powder and flour, then rub in the lard or vegetable shortening until you have breadcrumb-like texture. Add the water and mix into a dough using a dough scraper.

Turn out onto your counter and knead for a few minutes until you have a smooth and elastic dough. (Alternatively throw into a mixer with a dough hook for a few minutes). 
​
Wrap and leave to rest for 20-30 minutes for the gluten to relax before dividing your dough into six equal pieces (approx. 85g), roll into little balls and cover with a cloth whilst you roll individual ones out. 
Picture
Picture

The tortilla is ready to turn when you see it blistering all over (about 30-45 seconds), flip and bake on the other side for another 30 seconds or so.  If you over-bake, the dough will begin to crisp.

​Practise will make perfect!

You can stack the tortillas as you bake each one, but cover with a cloth each time, to ensure they keep the steam in and remain soft and pliable as they cool.
 
The cooked tortillas can be wrapped when cool and kept for several days, or you can divide the dough, keep some in the fridge for 2-3 days and cook fresh when needed.
Flour your counter well then, using a floured rolling pin, roll each piece into a thin disc, approximately 25cm in diameter and ensure they are well-floured as you stack them ready for baking. Ideally, make two piles of three, to prevent them sticking together. This dough is very soft so should easily roll, but you may need to be diligent with keeping both your counter and the rolling pin floured. Turning your tortilla over regularly will help keep it from sticking. Once you’ve practised a couple of times, it should only tale a minute or so to roll out each one.

​Before baking, prepare your griddle or heavy skillet by ensuring it is very hot before you start cooking. Have a plate or steam basket ready to stack them as each comes out of the pan and a clean tea towel ready to cover them and keep them soft. Each tortilla should only take about a minute or so in the pan — no need for oil. 
Picture
Picture
Comments
    Picture
    Our workshops are run by award-winning sourdough baker Helen Underwood.

    Categories

    All
    Awards & Press
    Events
    News
    Recipes
    Specials

    Archives

    December 2024
    November 2023
    April 2023
    February 2021
    January 2021
    August 2020
    July 2020
    June 2020
    May 2020
    April 2020
    March 2020
    October 2019
    September 2019
    April 2019
    March 2019
    February 2019
    January 2019
    April 2018
    March 2018
    December 2017
    October 2017
    September 2017
    April 2017
    February 2017
    January 2017
    November 2016
    October 2016
    September 2016
    August 2016

[email protected]
  • Home
  • About Us
    • About White Cottage
    • Blog
    • Contact Us
  • Resources
    • Recipes
    • "How-to"s >
      • Making & Refreshing a Starter
  • Workshops
    • Recommended Reading
    • About Our Workshops
    • Book Workshops
    • Workshop Calendar
    • Terms & Conditions
  • Residential Retreats
    • Baking Retreat, Tuscany, Italy
  • Poacher's Cottage
  • Corporate
    • Hospitality & Teambuilding
    • Reviews & Awards >
      • Awards & Press
      • Workshop Reviews
    • Industry Training
  • Terms & Conditions