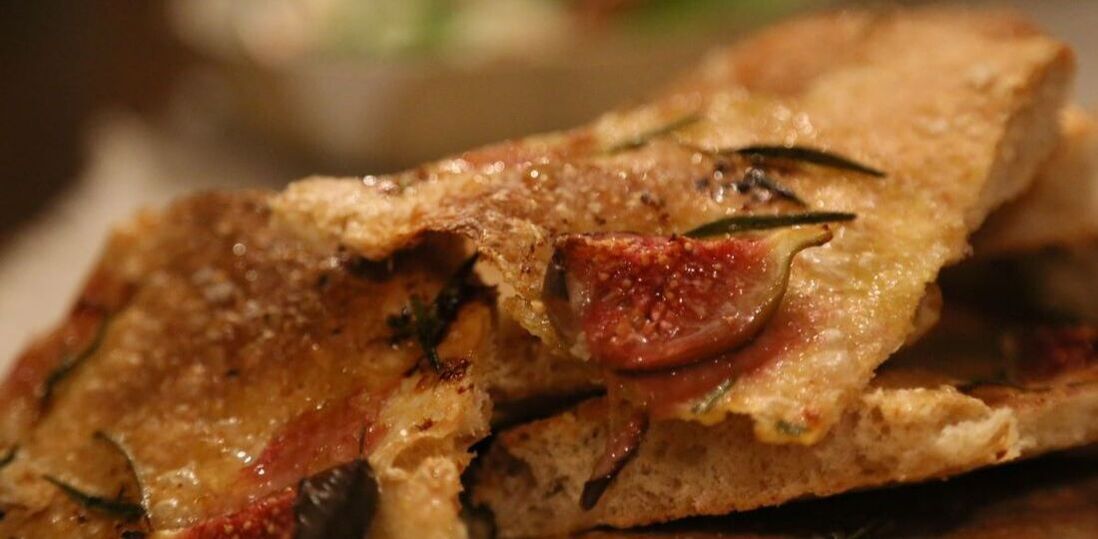
 Schiaciatta – literally ‘squashed’ or ‘flattened’ – is a Tuscan version the popular Italian flatbread focaccia. Their shape and size can vary, much like pizzas, but they are generally thin, resembling giant crackers in some cases. To stretch so thin the dough must be very well rested, so this dough should be made well ahead of time and can be kept in the fridge for up to 5 days. I like mine to have a varied thickness rather than uniform, so I prefer to hand stretch, leaving some parts very thin and crispy and others with a bit more of a chew. Like focaccia, you can top with a variety of different toppings, but going with the classic olive oil, scattered herbs and flaky sea salt is never a disappointment. This recipe is also perfect for when figs are in season, but substitute for whatever you have to hand. Black grapes make a delicious alternative.
Schiacciata (makes 1 large tray, approx. 40cm x 30cm) Ingredients For the dough: 360g 00 flour (or half plain, half bread flour) 50g wholemeal flour 6g fresh yeast (or substitute 3g dried instant yeast) 260g tepid water 40g oil 7g salt Suggested toppings: A few tablespoons of olive oil A scattering of flaky sea salt A few sprigs of rosemary Method Mix and knead the dough for about 10-15 minutes until strong and elastic. Leave covered for 30 minutes in an oiled bowl. After it has rested, stretch and fold the dough and return to the bowl. Repeat after another 30 minutes then place, covered, in the fridge for up to 5 days. If you want to use the same day, simply make in the morning to use in the evening. Two or three hours before you wish to use the dough (less, if a very hot day) remove from the fridge. Preheat your oven to 240°C. Prepare a shallow tray, preferably the largest baking tray you have that fits your oven, by smothering in olive oil. Now place your dough, with the top side uppermost, onto your tray. Use the weight of the dough to gently stretch the dough to fit your tray. Encourage the dough to stretch from underneath, rather than ‘pushing’ the top of the dough, which risks tearing it. Concentrate on thinning particularly thick areas, but don’t get too hung up on uniformity. The wafer-thin parts will be delightfully crispy, the thicker parts more like pizza. If struggling to fit the area, cover and leave to rest in the tray for a few minutes. When you return, the dough will have relaxed and be more than ready to stretch further. When stretched, cover the dough and leave for a further 15-20 mins, unless it is a particularly warm day and it looks as if it is ready to go. Just before baking, scatter the rosemary, drizzle generously with olive oil and top with flaky sea salt. Place in the oven and reduce the temperature to 220°C. Bake for 20-25 mins until crisp and golden. When baked, remove from oven onto a rack. Enjoy while warm. 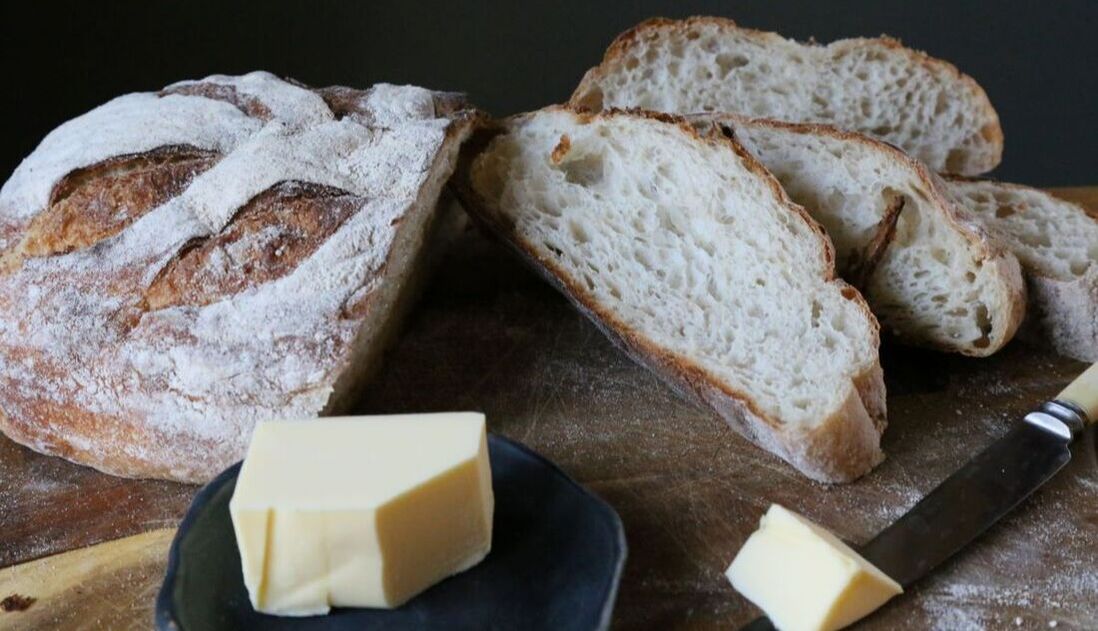 Potato Bread (Makes 1 large loaf, 2 small or about 8 rolls)
For the potato: 300g potatoes (peeled weight) 280g water For the dough: 300g above cooked potato, riced or mashed 350g strong bread flour 180g above potato water 6g fresh yeast (or 3g instant dried yeast) 8g fine sea salt Method First cut your peeled potatoes into rough chunks, about 2cm cubes. Place in a pan with about 280ml of water and bring to the boil. Boil for about 15 minutes until just tender but not falling apart. Drain and reserve the potato water. This starchy liquid will be used to make your dough beautifully soft. When cool, either mash your potatoes or place through a potato ricer. Now place your potato and starchy water in a bowl or mixer. Add the flour, salt and yeast, ensuring the yeast is kept separate from the salt, at least initially. Mix with your scraper until all ingredients are combined and a rough dough has formed. Turn out onto your work surface and knead for 15 minutes or so, until you have an elastic dough which doesn’t stick to the work surface or your fingers. Alternatively, knead in your mixer, using the dough hook attachment for approximately half the time. Form the dough into a ball and place back into your lightly floured bowl. Cover with a large plastic bag or a baking cloth and leave to rest for 30-40 mins. Now it’s time to fold and stretch your dough: using your scraper, turn the dough carefully out onto a lightly floured surface – with the ‘top’ of the dough now underneath. Taking the 4 points of the compass in turn, pull the dough gently outwards then bring over to the middle point of your dough (as if you were making a paper windmill). When all 4 ‘corners’ have been brought into the middle, turn your dough back over and place back in the bowl, so that the ‘top’ of the dough remains uppermost. Rest, covered, for a further 20-30 minutes so the dough can relax again. Now, you are ready to shape your dough ready to place into a tin, a proving basket or into rolls. Carefully tip out the dough onto a lightly floured surface. Turn the dough back over so that the ‘top’ of the dough is now uppermost. Divide into portions for rolls or loaves, then shape into a smooth ball, or oval if baking in a tin. Be gentle with this dough and don’t be too worried about tightening your chosen shapes, as this soft, tender dough is easy to tear. Feel your way and be guided by your dough. If shaping your dough in an oval to fit a tin, remember to grease your tin before placing the shaped dough inside, with the seam concealed neatly underneath. Cover your loaf/loaves/rolls whilst they prove for a second time for 45-60 minutes until they appear nicely ‘bloated’ and are approximately double in size. Preheat your oven to 240°C. When the dough is ready (slowly springing back when you prod gently with a floury finger), place into your hot oven. Spray around the floor and walls of the oven to create steam then quickly close the oven. Turn down the oven to 220°C and bake until golden brown on top and bottom. Rolls will take 12-15 minutes, a small loaf will take about 25-35 minutes and a large loaf, 40-45 minutes. If you have a probe thermometer, the bread is cooked when the centre of the loaf reaches 95°C.  Quick and easy pitta breads (makes 12)
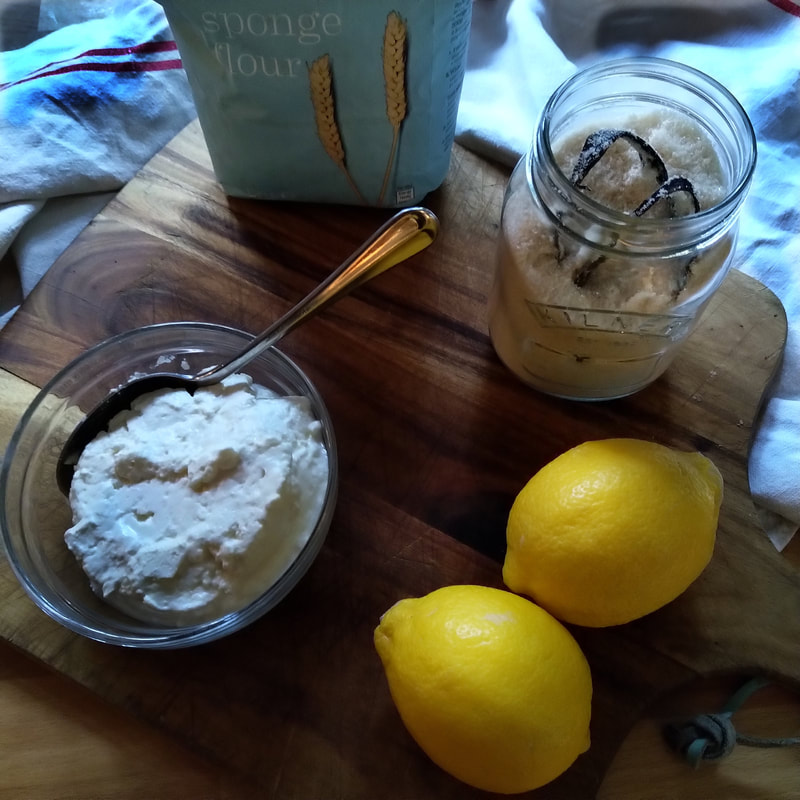
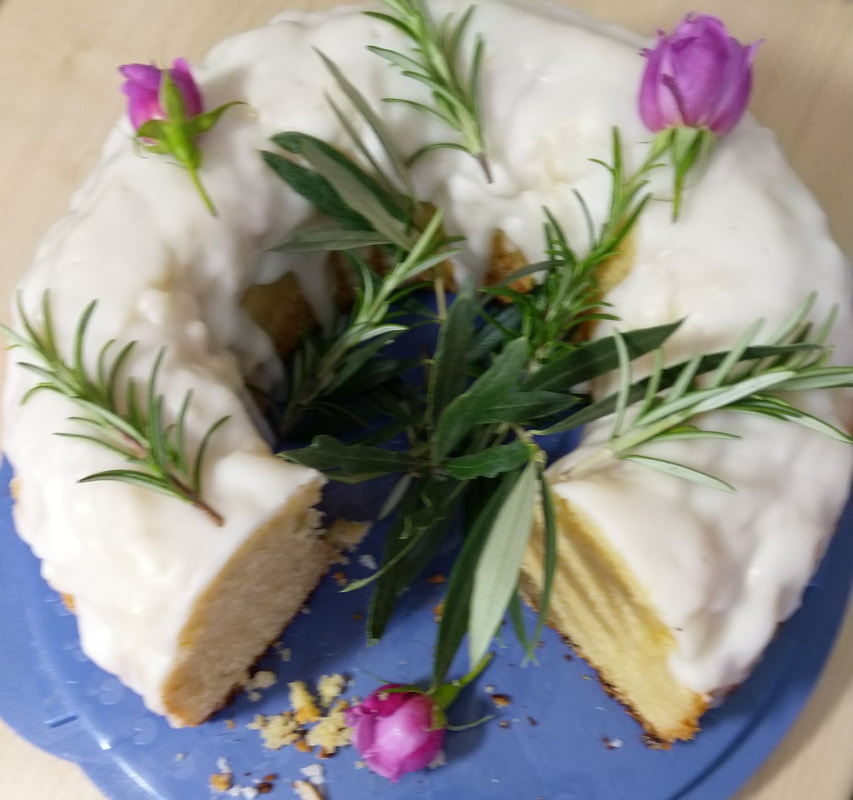
For the dough: 600g Strong white bread flour* 15g fresh yeast (or 7g instant dried) 2 tbsp olive oil 300g tepid water 10g fine sea salt *or substitute plain flour, if you don’t have bread flour. Method Place the dry ingredients in your bowl, ensuring the salt is on one side, the yeast on the other. If you don’t have ready yeast, follow the instructions on the packet for activation. Now add the water and oil and, using a dough scraper or your hands, bring the mixture together into a rough dough. Take out of the bowl and need for about 10 minutes until you have a smooth and elastic dough. Place back in a lightly dusted bowl, cover and rest for 1 hour at room temperature. Preheat your oven to 240-250°C, with a good quality baking sheet or baking stone in place to get super-hot. After about an hour or so, remove the dough and divide into quarters. Take each quarter, squash it a little, then divide into 3 pieces and form each into a small ball with a tight seam underneath. Each piece should finish up as a smooth ball, with no edges or rough bits showing. Cover once more and leave to rest for a further 15 minutes. Take the first 4 balls and roll out into ovals about 20cm long and even thickness. Place them on a lightly dusted peel, or onto a silicone sheet that can be slid straight into the oven. Slide into your oven and bake for about 5 minutes. They should puff up in the oven. Remove after 5 minutes and cover with a linen cloth whilst you cook the remaining two batches. Keep covered whilst they cool, so the pittas remain soft and pliable. If you don’t, they will dry and crisp up. When cool, they can be kept in an airtight container for several days or frozen immediately. 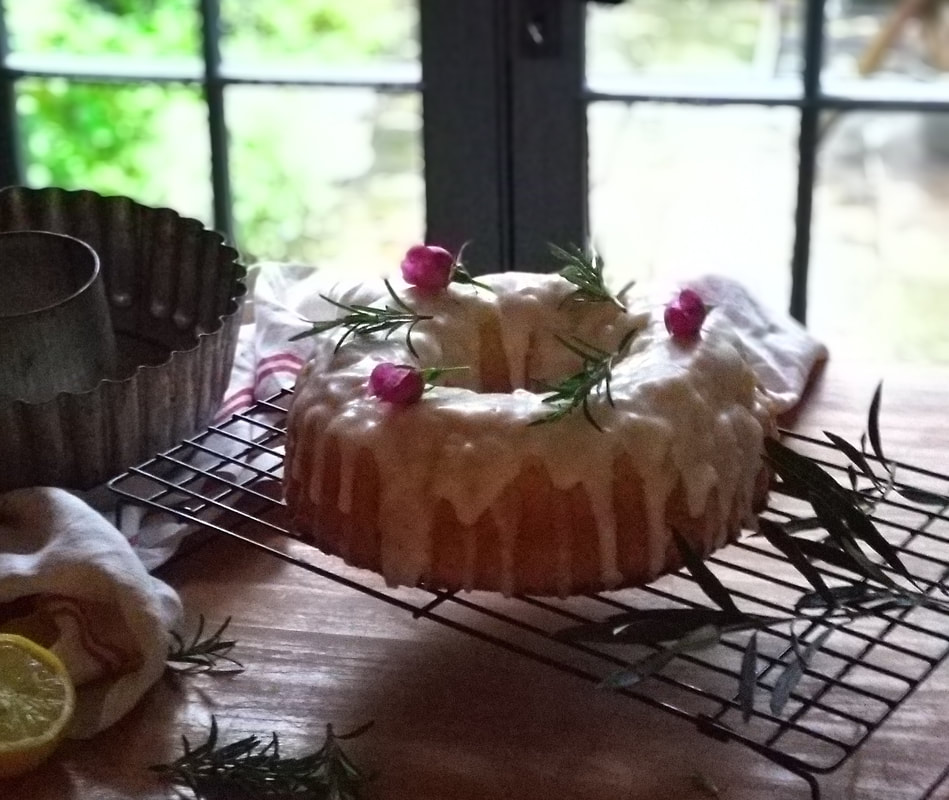 This cake was created to use the delicious curd cheese I brought back with me from Wildes Cheese after a delightful day spent learning about cheese-making. Philip and Keith run this small urban artisan dairy in Tottenham, North London. On reading about their passion for their craft I knew that this is where I wanted to learn. They say they were drawn to cheesemaking “because it’s pure magic, a form of alchemy”. Now, where have I heard that before?!! The curd cheese’s soft and velvety texture is perfect for making a rich bundt cake, especially paired with the sweet sharpness of lemon. The resulting cake is light and moist, in spite of its characteristically dense crumb. And it’s wickedly moreish!
Method Pre-heat your oven to 170°C. First prepare your bundt tin, by greasing and covering with granulated sugar. Set to one side. Zest two lemons and rub into your caster sugar. Now cream together your softened butter and caster sugar, until light and fluffy. Mix in the curd cheese and crème fraiche. Now split and scrape the seeds from your vanilla pod and stir in together with the lemon juice and ground almonds.
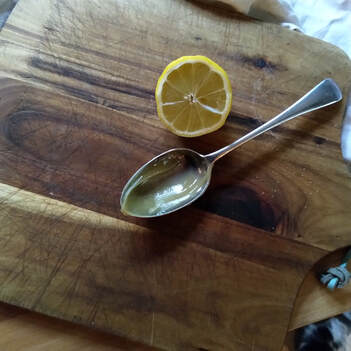
Whilst the cake is baking you can prepare the drizzle. Mix together the juice of one lemon and 50g caster sugar. When your cake is cooked, leave it for about 10 minutes in the tin then turn out onto a wire rack. Using a spoon, drizzle your lemon mix evenly over your cake and leave to cool completely.
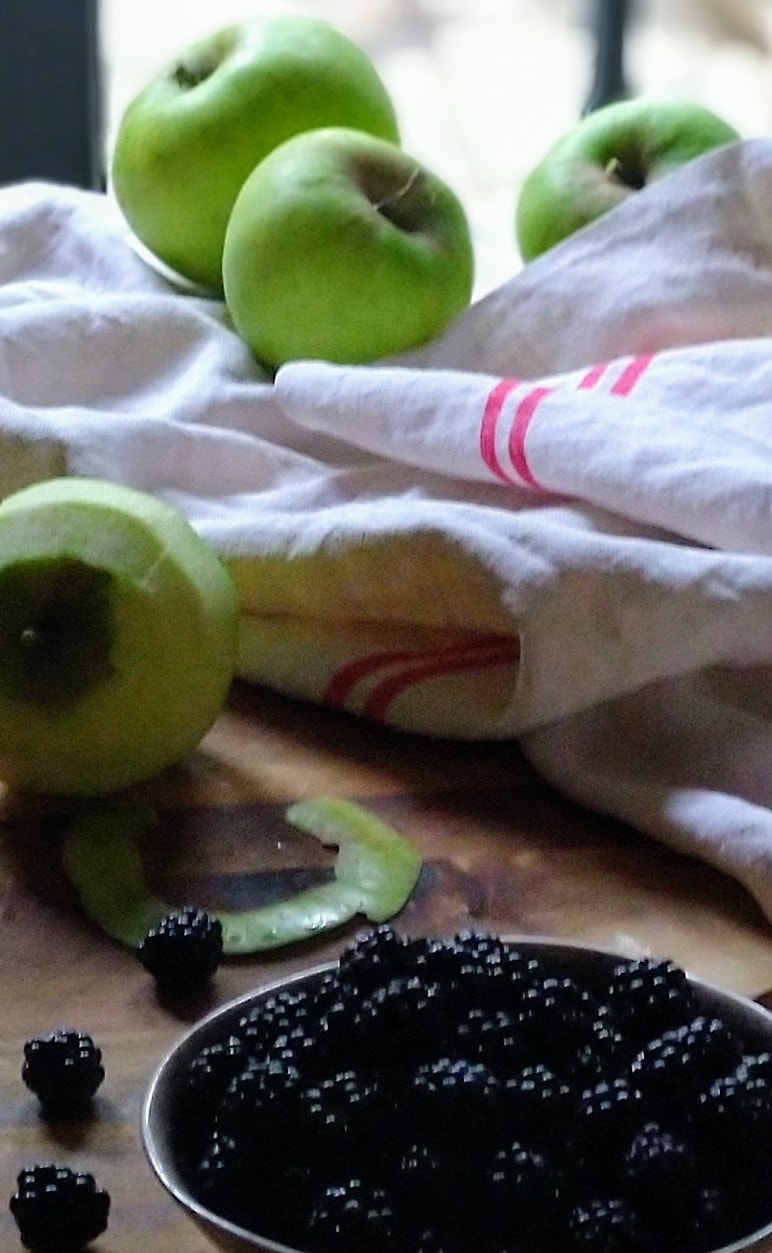
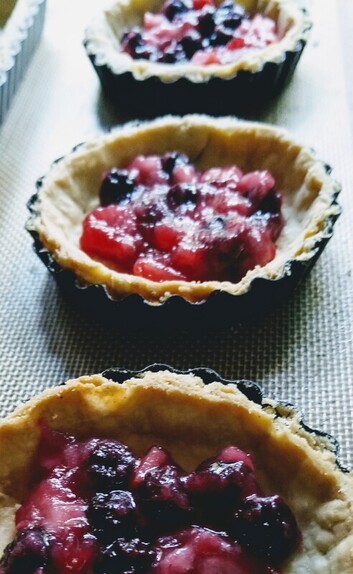
 Our communal village orchard is heavy with wonderful produce right now. The plums, mulberries and greengages are over, but now the apples, pears, quince and medlars now have their chance to shine. Even the hedgerows enclosing the old orchard are bearing blackberries and nuts to gather. With my basket laden, I set about baking something to use the village bounty. The nuts are, as yet, too young and fresh to grind down to a useful flour, so I used ground almonds – but if you have your own hazelnuts, do use once they’re dried. Just grind them down to a fine meal. The young cob nuts will be fine for the crumble topping.
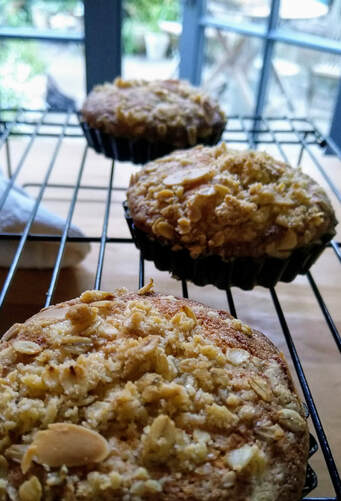
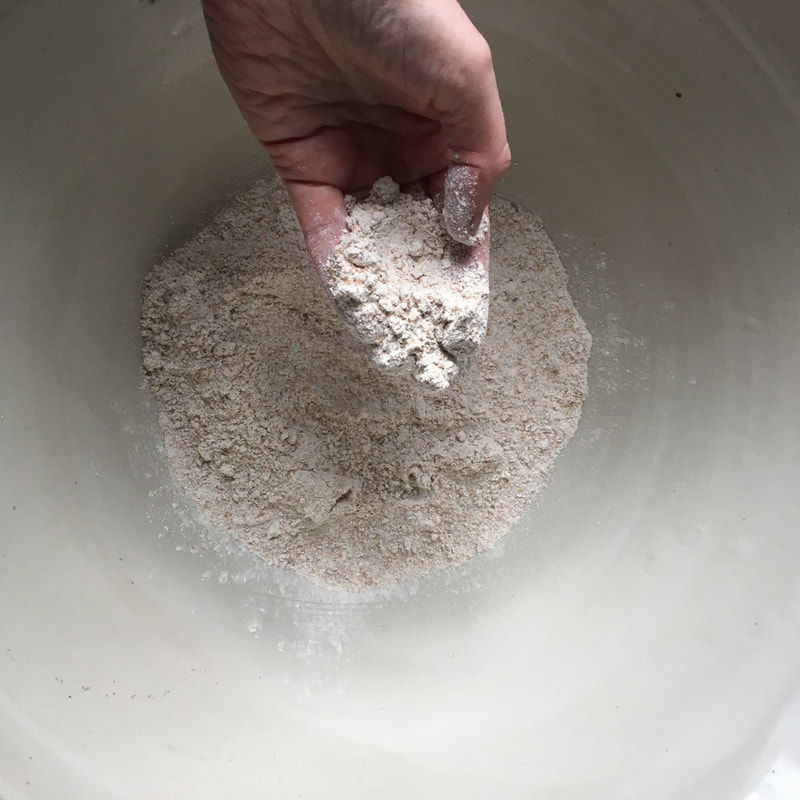
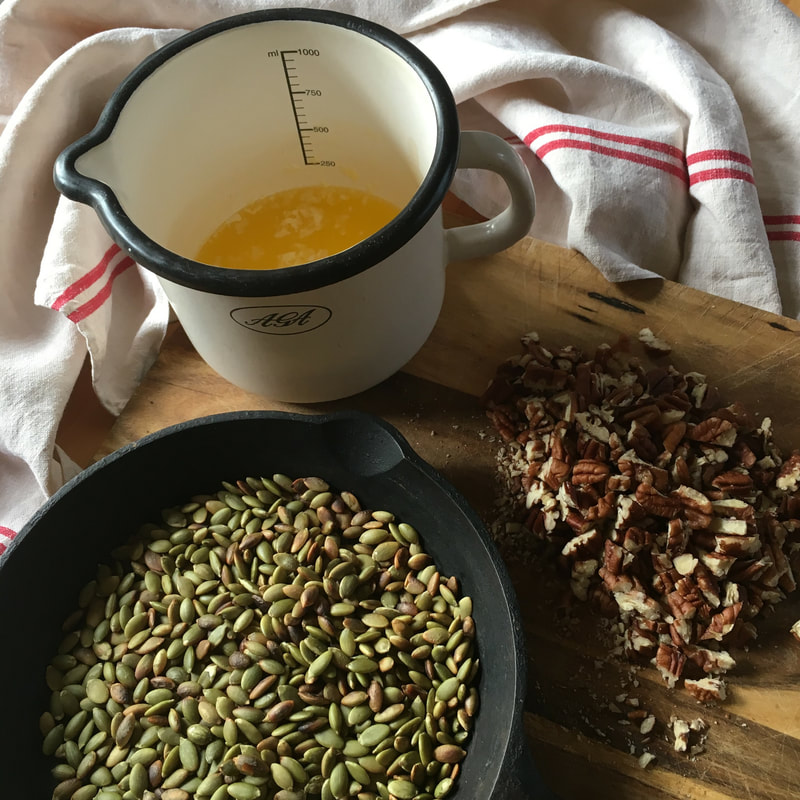
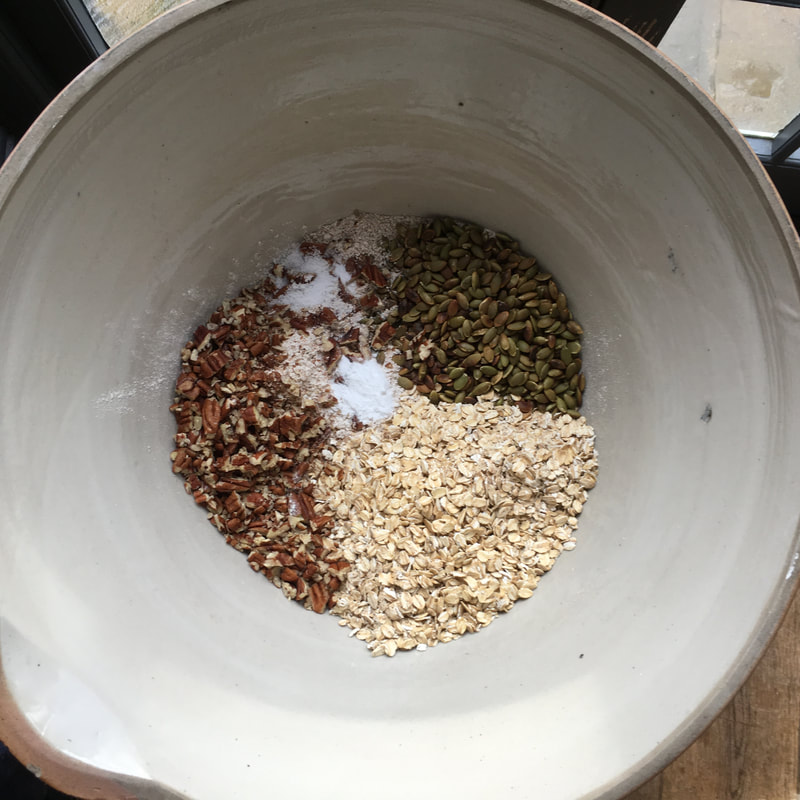
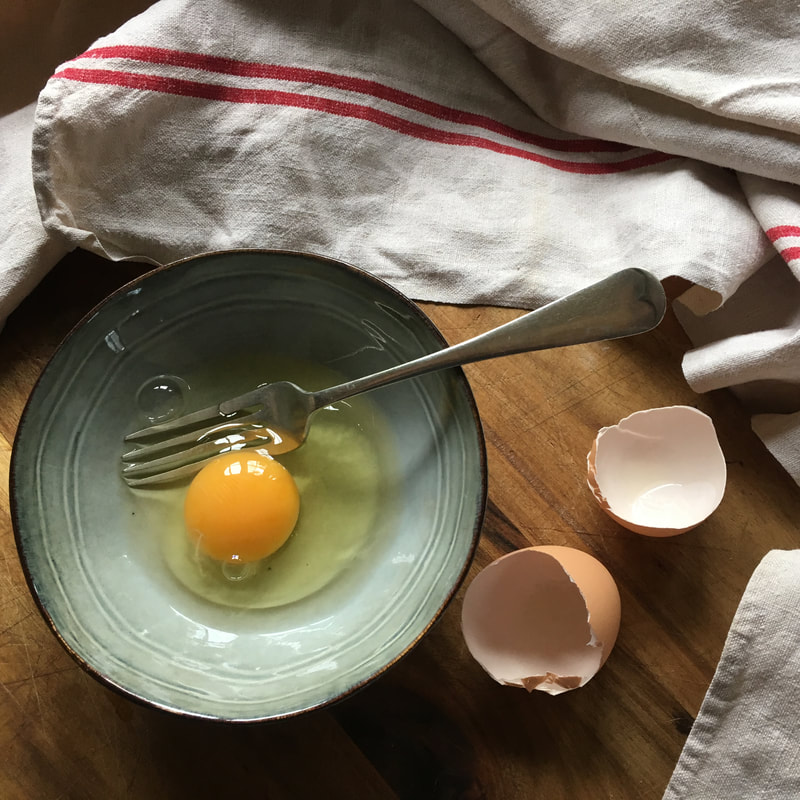
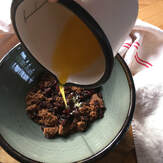
Eat with pleasure. You have spent time making a thing of beauty from things you have foraged. Take your time to savour. Enjoy.  These spelt cookies are usually available at breaktime on our workshops and we're often asked for the recipe. We're so lucky to have the most wonderful organic spelt flour grown and milled near the Baking School. I love to use it as much as possible. These cookies are so packed with goodness, they don't feel like an indulgence - just a healthy treat to keep you going when you're flagging between meals. You can use whatever dried fruit you like: raisins, cranberries, sultanas - even chopped dates or prunes. And you can choose to use all nuts, all seeds or, as I have done here, a combination of the two. Remember that seeds and nuts will be more flavourful if you toast them in a dry pan beforehand. Spelt, oat, fruit & nut cookies (makes 18-20 cookies) We make these cookies with the wonderful wholemeal spelt we buy from our local miller, at Foster’s Mill, but you can use any flavoursome stoneground spelt or other favourite wholemeal flour. They are filled with oats, dried fruit and seeds or nuts, so make a great morning snack or ‘breakfast on the go’! Ingredients: 125g wholemeal spelt (or other wholemeal flour) 100g jumbo oats 100g regular oats ½ tsp bicarbonate of soda ½ tsp salt 100g butter, melted 180g soft dark brown sugar 1 large egg, beaten 100g raisins or sultanas 50g toasted pecans (or choice of nut), chopped 50g toasted pumpkin seeds
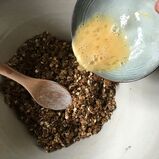
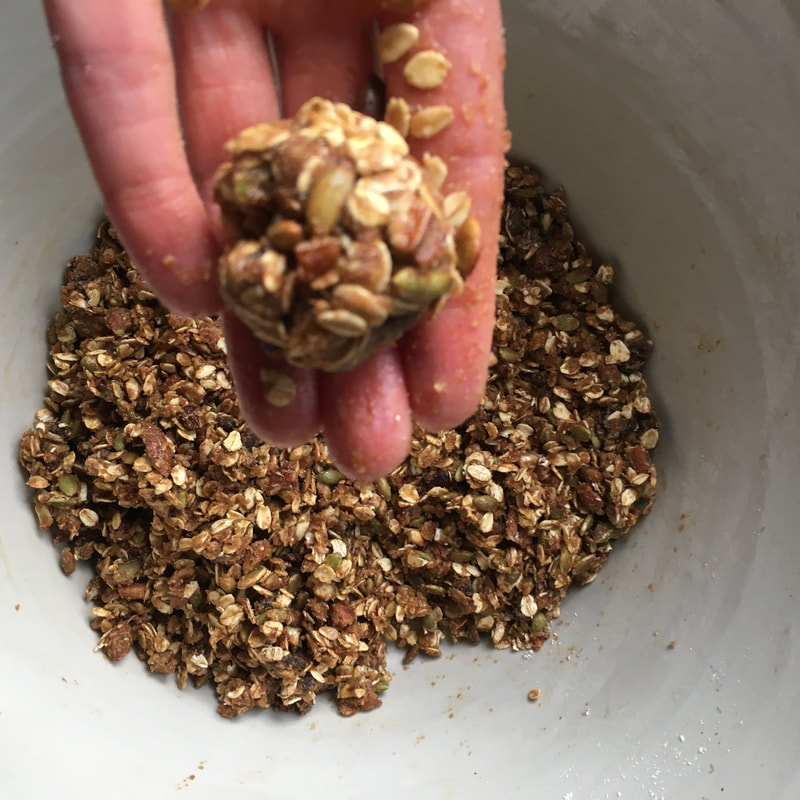
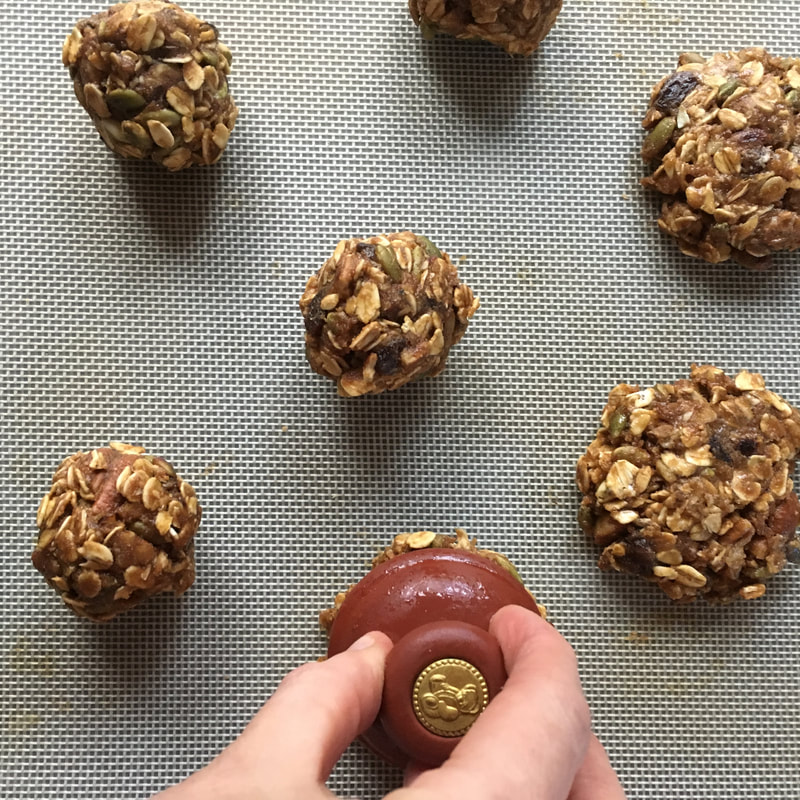
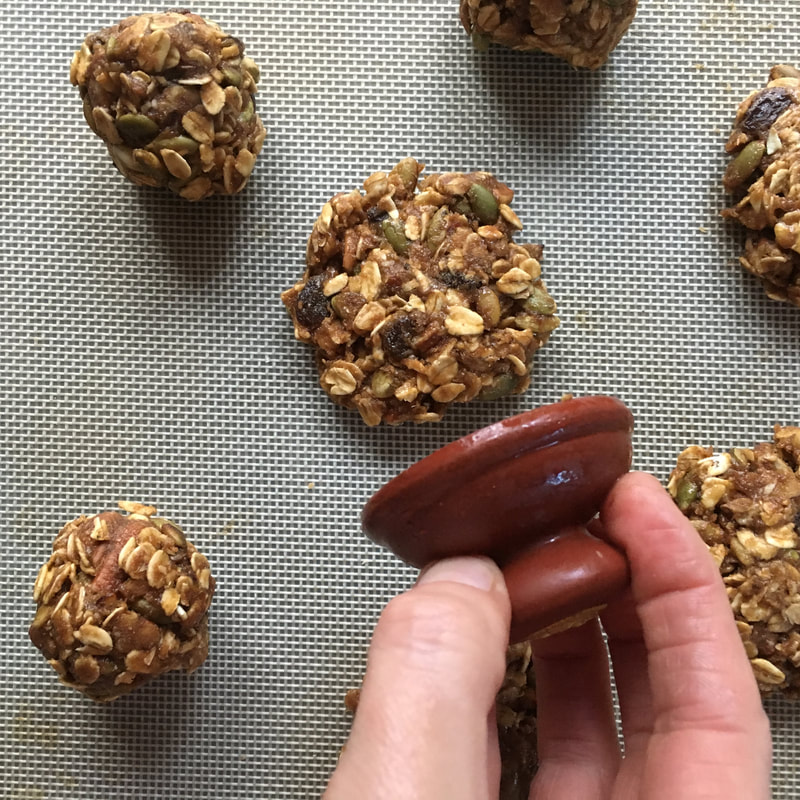
Taking a small dessertspoon of dough, roll into a tight ball the size of a walnut. You may find wetting your hands with water or oil may help at this stage. Place on a couple of baking sheets with room for spreading between each ball. Press each gently down with the base of a glass or biscuit press until they are 5-6cm in diameter.
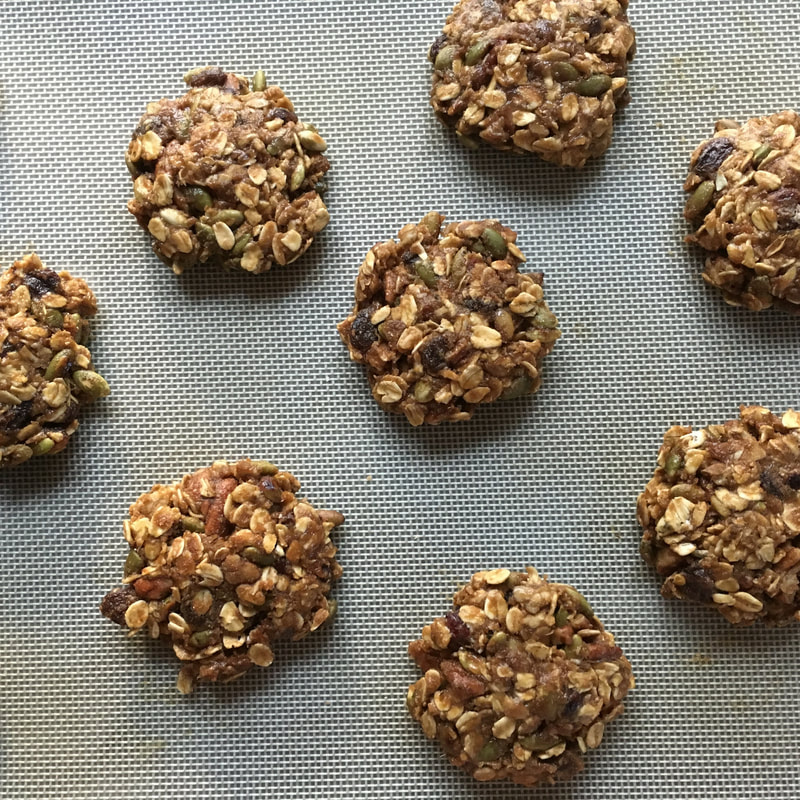
Bake at 180 degrees C for about 15-18 minutes. Leave to cool a little on the baking sheet before transferring to a cooling rack. When cool, store in an airtight container. The biscuits, if stored well, will remain crisp and fresh for 2 weeks or more.
 Shrove Tuesday or 'Fat Tuesday' as the Scandinavians would have it!! Whether you're planning to fast or not, a day to indulge. Countries across Scandinavia celebrate with variations of this Semla bun. Semlor are delicious sweet cardamom buns, enriched with butter and milk, then filled with a delicious honey almond paste and fresh cream. If you're a pancake traditionalist, why not try this alternative. Or if you're really planning on fasting, have both!
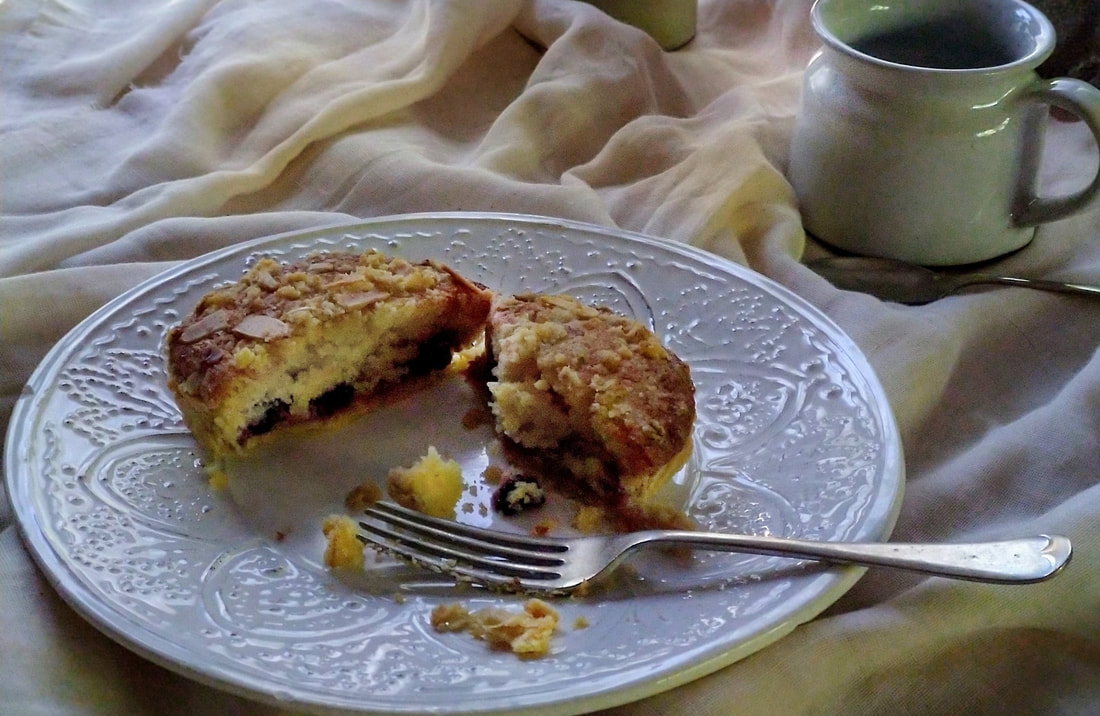
Semla buns (Makes 14-16 buns) Semla buns are a traditional Scandinavian treat, varying slightly across the region, but always served as part of a feast on ‘Fat Tuesday’, at the start of Lent. Much like our hot cross buns, although associated with a particular festival, they are so popular they can be found in bakeries for weeks beforehand. For the dough: Strong white flour 500g (or substitute for all or part white spelt flour) Milk 250g Fresh yeast 25g Sea salt 10g Butter, cubed 60g Caster sugar 60g Cardamom 7g Eggs 100g (2 medium, beaten) For the almond filling Ground almonds 120g Honey 45g Caster sugar 20g Milk 25g Plus, 350g double cream, whipped with 20g icing sugar Measure out your flour, sugar and cardamom into a large mixing bowl, then rub in crumbled yeast on one side of your bowl (for dried yeast use half the amount). Now place the salt on the other side of the bowl. Keeping your butter to one side for now, add your milk and eggs and mix with your scraper until all ingredients are combined and a rough dough has formed. Turn out onto your work surface and knead for 10 minutes or so, until you have a nicely elastic dough. Now add your butter and knead for another 5 minutes until your dough is fully developed. Form the dough into a ball and place back into your lightly floured bowl. Cover with a large plastic bag or a baking cloth and leave to rest for about an hour. After one hour, your dough should have roughly doubled in size. De-gas your dough and divide into two, take each half and divide into 8 pieces of approximately 60g-65g each. Being careful to slap any excess gas out of each piece and, using the friction of a flour-free workbench, form each piece into a tight little ball, being careful to place the seam on the underside, before placing on a lined baking tray to prove. Ensure you leave enough space between each roll to allow it to double in size. You may need to use two baking sheets. Cover and leave at a warm room temperature for about an hour (ideally, 22°C - 25°C), but do not place anywhere too warm. If your kitchen is a little cooler, just leave a little longer. After one hour, your rolls should be roughly double in size and will return slowly back to shape when depressed gently with a floury finger. Preheat your oven to 200°C. Just before baking, sprinkle a little flour over the top of each roll. Place them into your hot oven and then turn the temperature down immediately to 180°C. Bake for 10-12 minutes. The sugar content in the rolls will cause them to brown quicker than ordinary bread rolls, so do check they are not browning too quickly. If they are, you may need to turn your oven down by 10 degrees or so. Leave your buns to cool on a wire rack and meanwhile you can prepare the almond and honey filling and whip your cream in preparation for assembly. For the filling: Place your ground almonds, honey, sugar and milk in a bowl and combine until you have a kneadable paste. Divide your mixture into 16 (approximately 13g each) lumps, roll into tight balls and put to one side. Now take your cream and whisk together with a little icing sugar until you reach soft peaks, taking care not to over-whip your cream. Assembly: Once your buns have cooled, cut most of the way through your bun about one third of the way down, creating a ‘hinged lid’. Inside insert a disc of honey and almond paste made by flattening the balls you made earlier, and then spoon or pipe fresh cream on top, before gently closing the lid a little. Finish with a little sprinkled icing sugar. And there we have it! A delicious alternative to pancakes on Shrove Tuesday. Or any day! 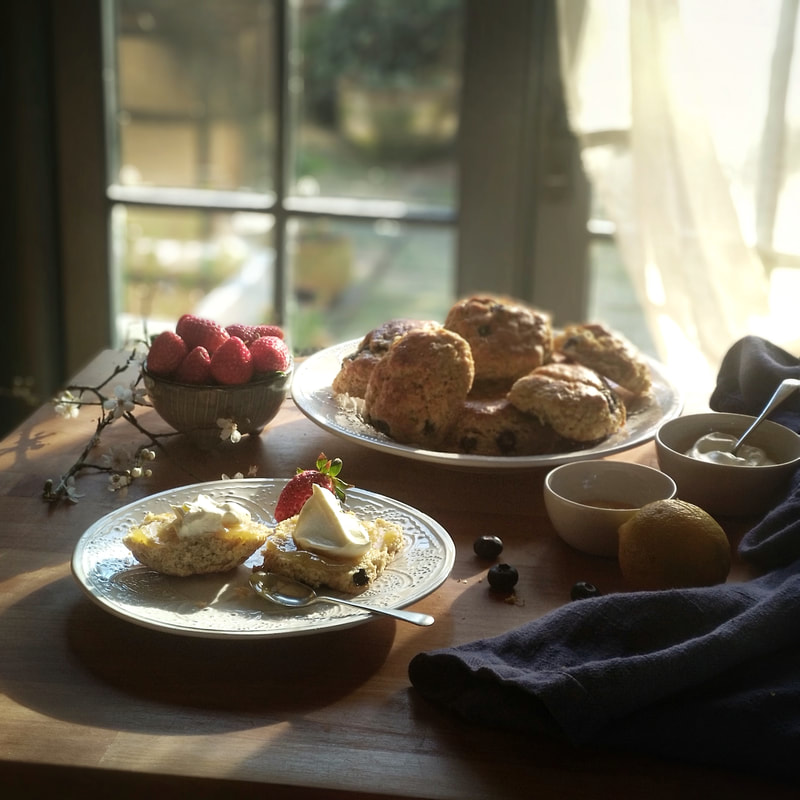 I'm often asked for recipes to use up that unused sourdough starter. I hate waste and, knowing many of you don't have the time to bake as regularly as you might like, inevitably there will be times when you have to discard unrefreshed starter before feeding your 'mother' in your weekly routine. With the unseasonably warm weather we've been having lately and blossom bursting out all over the garden, I was seduced into daydreaming about the summer and teas on the lawn. I found myself making up a batch of delicious lemony scones, bursting with tangy blueberries. Not exactly seasonal, I know, but I couldn't resist the bright colours of the berries on the counter of my local shop! Even the butterflies and bees have been fooled into thinking summer is on its way!
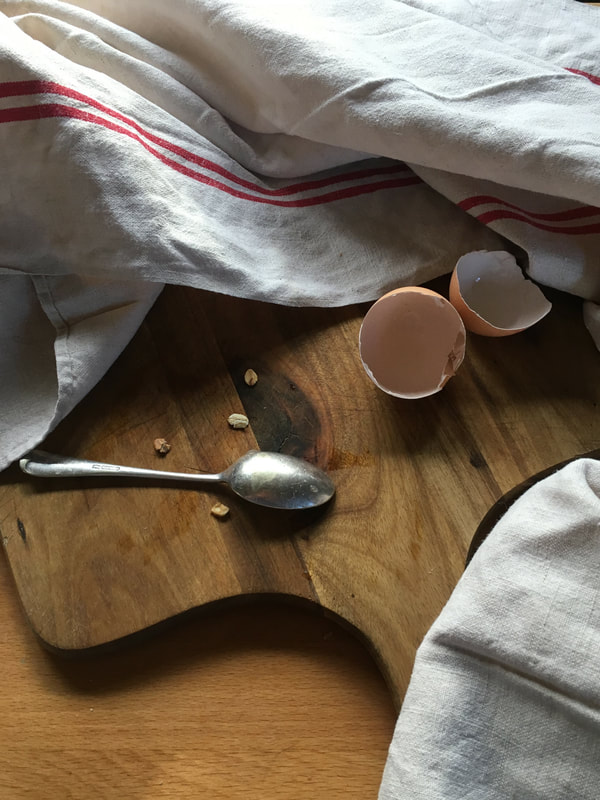
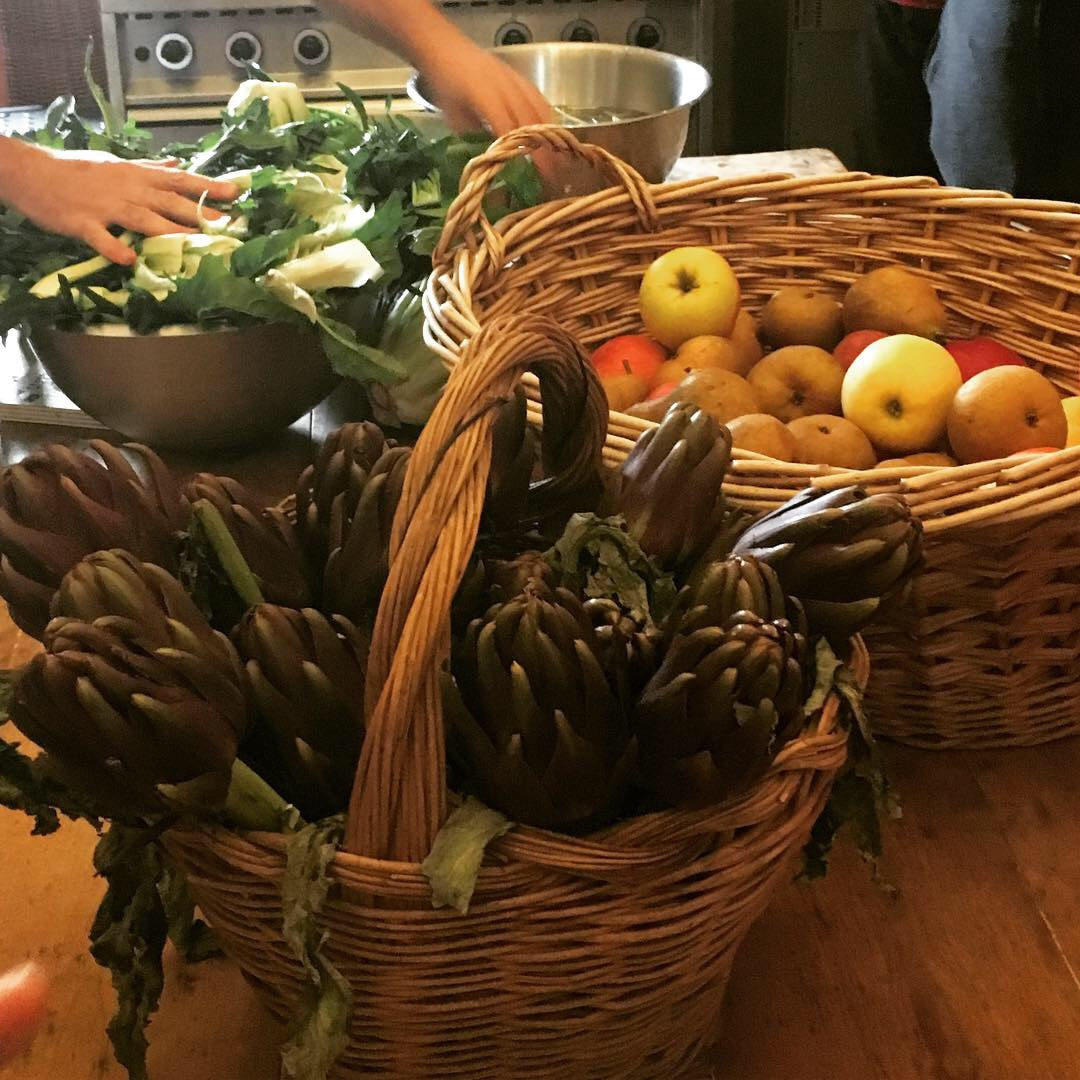
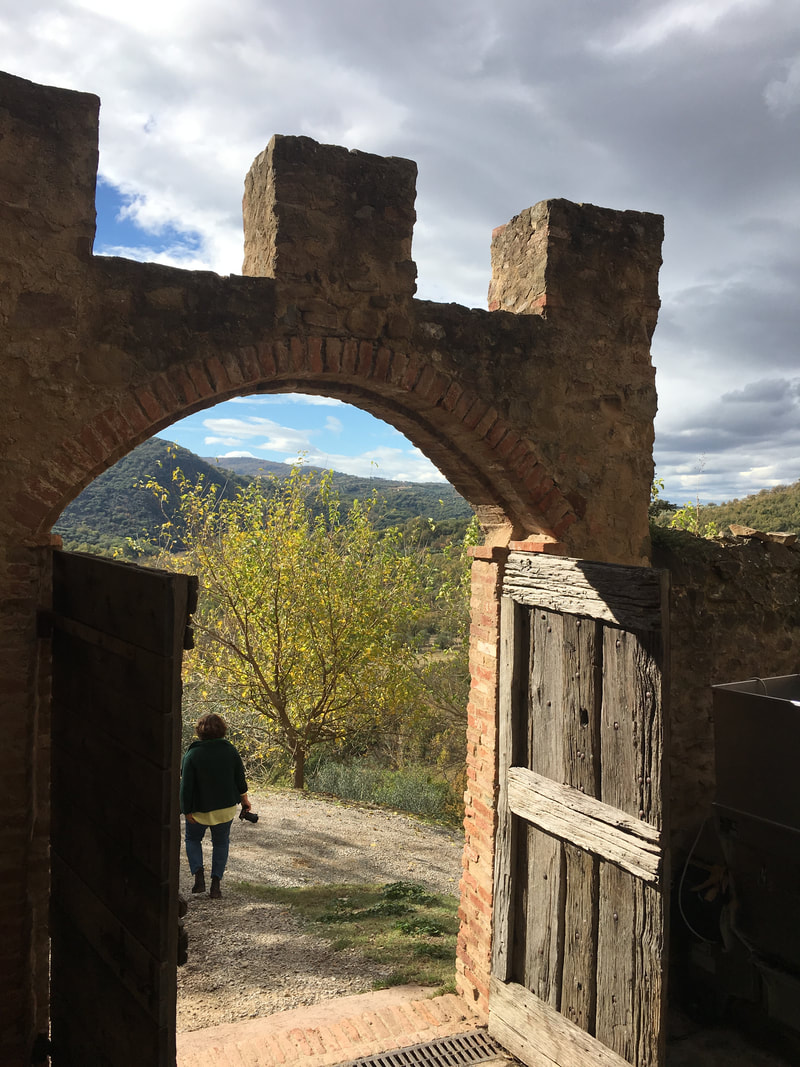
Now, scones are a very personal thing. I love them and fondly remember my mother's from my youth. I'm often drawn to them in cafes, but have learnt over the years that they frequently lead to disappointment, as I bite into one and get that familiar baking powder 'squeak'! I like my scones to be soft, light and moist. And utterly without squeak. A batch of these scones takes a matter of moments to put together - perfect for those short notice visitors or that urge for 'a little something' mid-afternoon, with a perfectly brewed cuppa. In fact, scones freeze beautifully, unbaked, so why not whip up a double batch? Place one tray in the oven and the other in the freezer. Once frozen, you can transfer them from the tray into a freezer bag or plastic box. When you want to bake them, defrost for 45-60 mins on a baking tray at room temperature and bake as normal. Even easier, for those last minute guests! Lemon & Blueberry Sourdough Scones (Makes 8-9 scones) Ingredients: 180g plain flour 80g wholemeal flour 100g unrefreshed liquid starter (100% hydration) 1 tsp bicarbonate of soda 1/2 tsp sea salt 90g golden caster sugar Zest 1/2 lemon 75g cold butter, either cubed or grated 1 tsp vanilla extract 150g buttermilk 150g blueberries (preferably small, firm and sharp-tasting) Method: Preheat oven to 180C Firstly, weigh out your flour, bicarbonate of soda and salt. If using a food processor, blitz the flour mixture with the cubed cold butter. Do not overwork. If mixing my hand, try grating your cold butter into your flour, then rubbing briefly together to get a better blended, breadcrumb-like mix. Do not worry if you still have and uneven distribution of butter, just ensure that there are no excessively large lumps. Now add your sugar, lemon zest and blueberries, mixing lightly with your hands to ensure an even distribution. In a separate jug or bowl, weigh out your unrefreshed liquid starter and buttermilk, together with your vanilla essence. Mix thoroughly, then add your liquid to your other ingredients. Mix together, until the dough just comes together - remember, the less you handle at this stage, the lighter your scones will be. Turn your dough out onto a lightly floured surface and use your hands to pat into a square, approximately 4cm high. Divide into 9 squares (3 x 3), cutting firmly with a dough cutter or sharp knife. Alternative, you can use your favourite cutter, to make round scones. Place on a baking tray and brush with a little beaten egg. Bake for 18-20 minutes, until golden brown. (Alternatively, if you have no blueberries, subsitute for 100g soft sultanas, for delicious lemon and sultana scones). When cool, serve with fresh cream and homemade lemon curd.  photograph by Ash Nayler // ashnayler.com Towards the end of 2018, I was privileged to join a group of chefs, writers, farmers, archeologists, photographers and filmmakers for Terroir Tuscany. One thing unified us all - food: its provenance, history, politics, production and sustainability. Hosted by Charlotte Horton of Castello di Potentino, our breathtaking setting, and Arlene Stein of Terroir Hospitality, we spent 7 days learning from each other and local expert producers. We would meet each day after breakfast for talks in the importance of terroir and the power and politics of food today and throughout time, with a particular emphasis on the unique region of the castello, with its history pre-dating Etruscan times.
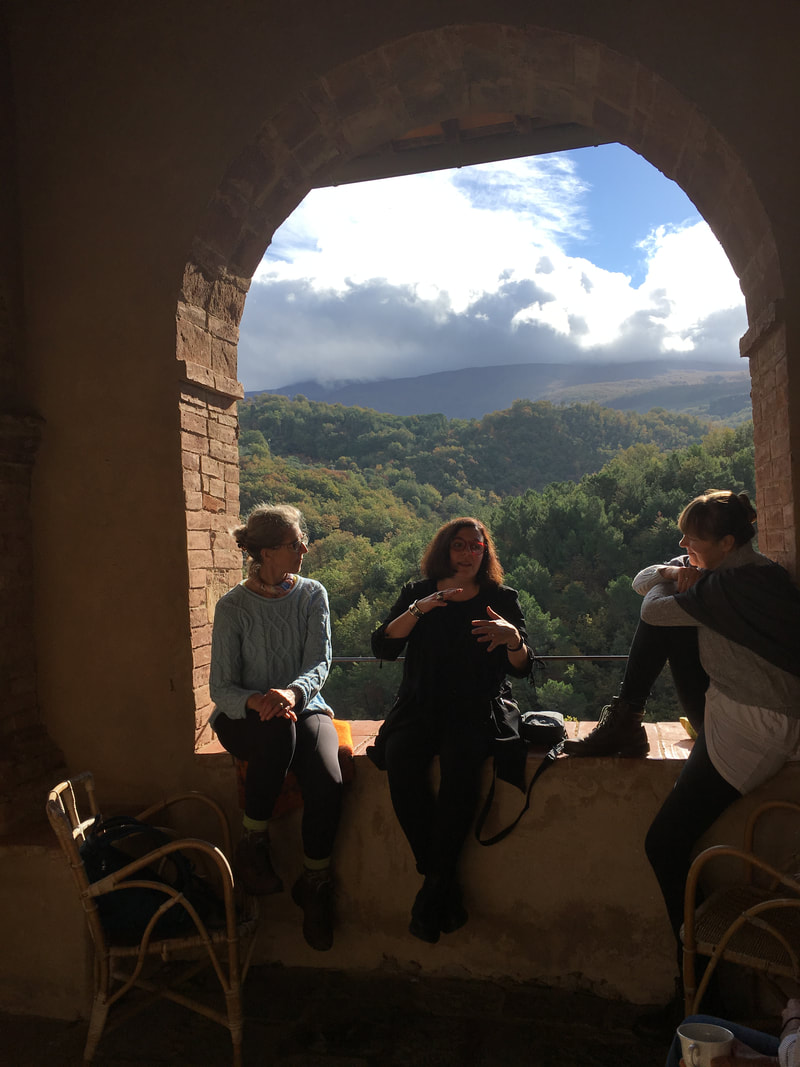
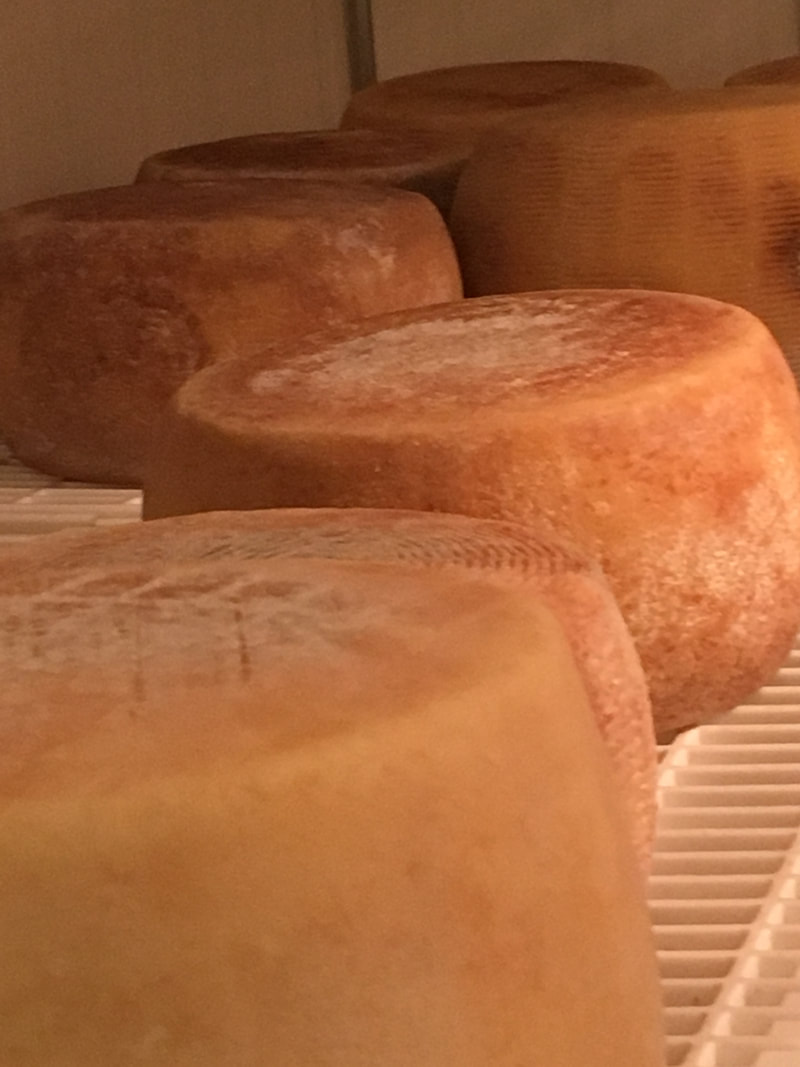
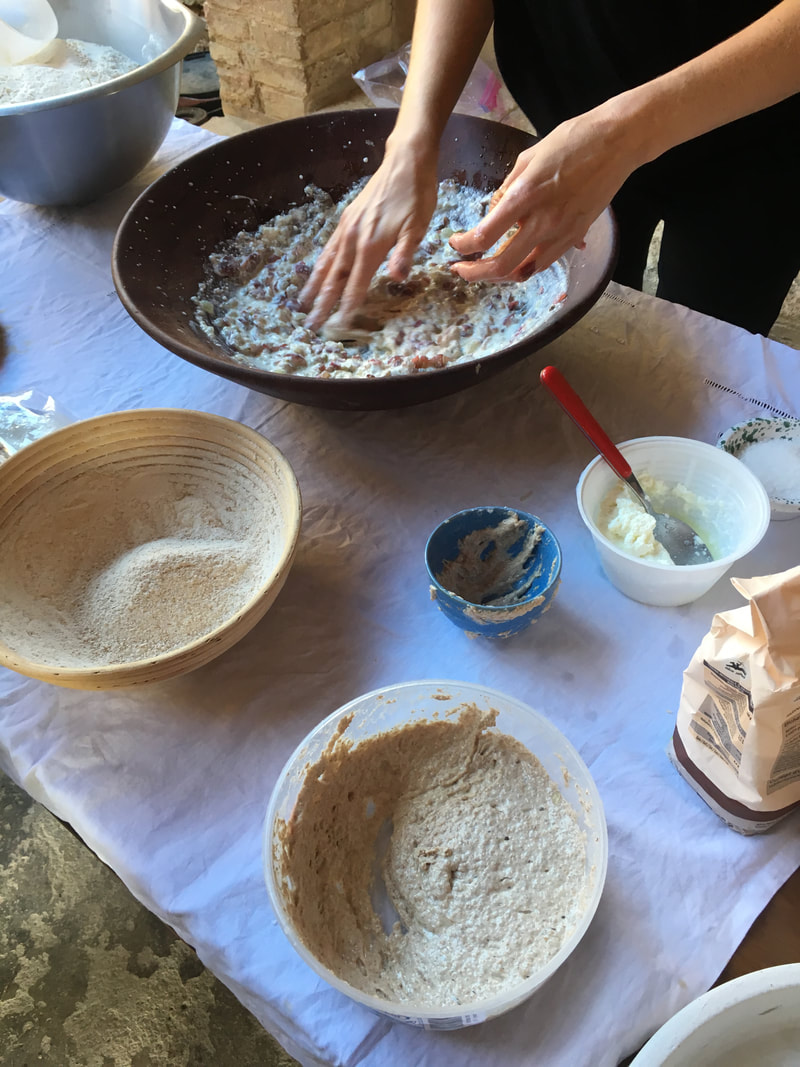
Charlotte and Arlene had worked immensely hard to curate a programme which enthralled, educated, entertained and moved us all. Talks, discussions, debate and hands-on workshops filled our days, whilst our evenings were spent sharing wonderful, locally-sourced food and the castello’s delicious wine. And as the evenings stretched into night, we would gather in the courtyard, warming ourselves by the open fires as we listened to the sounds of the guitar and marvelled at the star-strewn Tuscan skies. Every day we learnt from a different expert producer from the region. We made cheese - delicious ricotta and pecorino, - we picked olives and tasted the new season’s oil, we made bread from ancient grains and recipes, we toured the castello’s vineyards and cellars, tasting wonderful local wines, we observed the Teatro Porco, as the local expert butcher prepared an entire pig for meat and charcuterie, we made fresh pasta and foraged wild plants and fungi nestling in the local hillside.
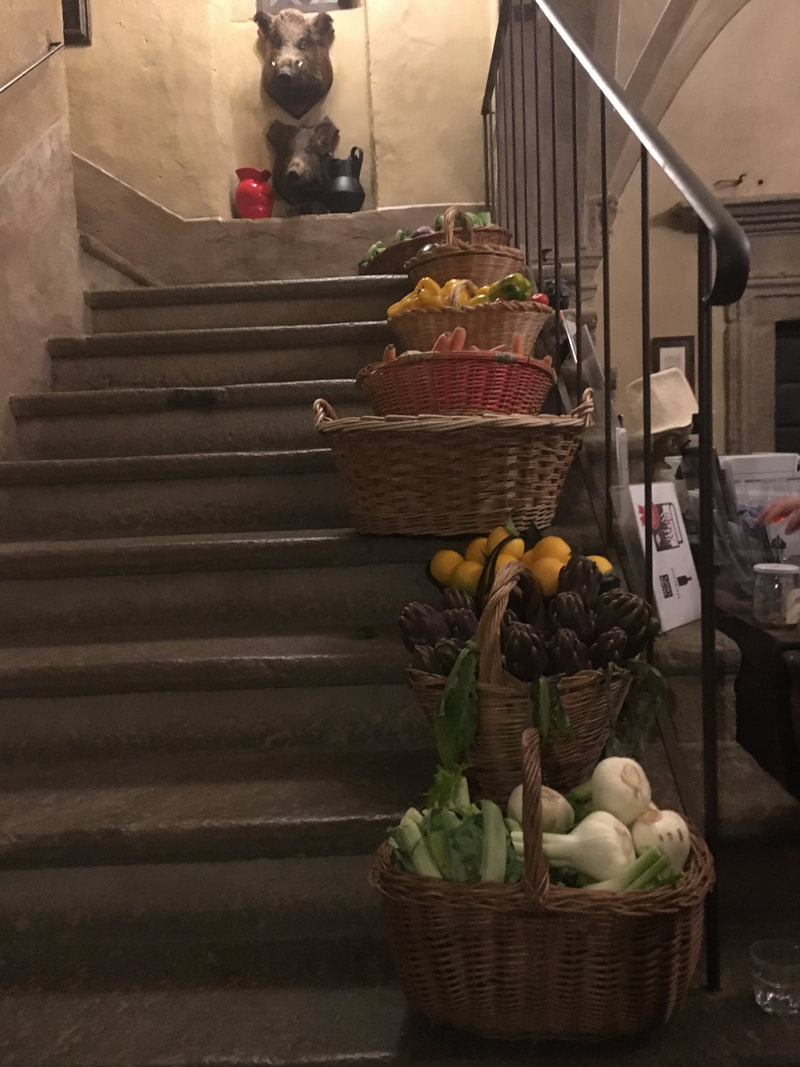
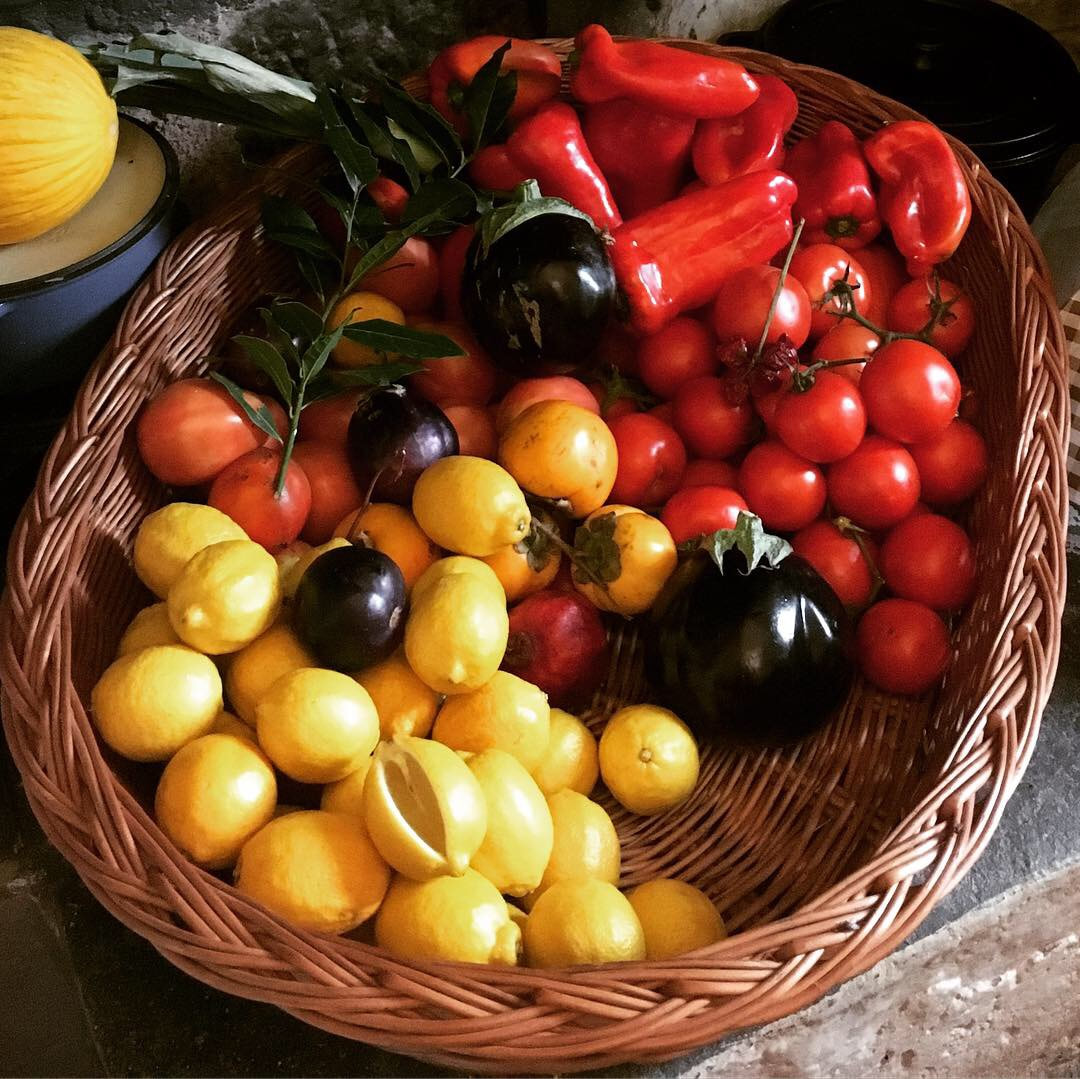
And we ate. Oh, how we ate! Cooks, chefs and restaurateurs were legion amongst us and, each afternoon, a posse of volunteers would gather in the ancient castle kitchen to make the evening meal. Baskets of vegetables and herbs filled the ancient fireplace and an impromptu menu would be devised from that day’s offerings. We shared ideas and knowledge, whilst learning so much under the relaxed tutelage of the some of the world’s most accomplished chefs (peppered with a Michelin star or two). How could it be anything but relaxed, as we prepped vegetables, meat and grain around an ancient table, stone sink in the corner and glass of wine in hand. So many cooks, so much joy and laughter and not a single broth spoiled.
This Terroir was a life-changing opportunity. What we shared and learned touched us all. An awareness of terroir and consideration of what it means should be important to each one of us. Its influence is impossible to overstate and should be paramount to everyone working within the food sector. Terroir is more than just a region of land. It is at the core of every community. It is the history, culture, politics, power, sustainability and the future of food production. It should be at the heart of all we do. And if we put it at the core of what we do, we all become its ambassadors. We learn, we share, we influence, and we create both the power and will to change. My week at Castello di Potentino has changed my view of the world and my community. For me, the world has now become smaller and my community so much larger. We gathered under its ancient walls as strangers from disparate parts of the world. We left as friends.
We're delighted to announce an exciting new venture with the fabulous sourdough expert and chef, Hilary Cacchio, Hilary is author of the wonderful Sourdough Suppers, a seasonal guide to eating and savouring your daily sourdough. My heart warmed to her the minute I read the phrase 'serve with a good wedge of sourdough' throughout the book. Although I may have been influenced by the Prune, Armagnac and Honey Ice cream Sandwiches (made with brioche, of course!). Oh my! Hilary spends half the year in France and half the year here in the UK, teaching sourdough baking in London for schools such as Bread Ahead, Divertimenti and, formerly, Leith's. Our shared passion for food and our love of sourdough has drawn us together and now we're putting our heads together to come up with a wonderful residential bread making course in the heart of the beautiful French countryside. Plans are coming together for October 2019, when we hope to offer a French- inspired baking and cooking course, taking in local markets and mills, to make the most of the fabulous fresh seasonal produce and traditionally milled French flour. We'll keep you posted with updates, both here and via social media. In the meantime, feel free to drop us an email at helen@whitecottagebakery.com if you want to register your interest. There's no commitment at this stage, but those on the mailing list will be first to hear details of the full package once booking is live. A bientot!
|

Our workshops are run by award-winning sourdough baker Helen Underwood.
Categories
All
Archives
November 2023
|